Gohan飯: How to cook Japanese Rice

Truth to be told, our home is often chaotic. Our girls speed through our home and our life boosting with energy, laughter and all sorts of ideas. Naturally this is not just a recipe for love and understanding between the siblings, it also has quite a potential for conflicts… But when it comes to my question what they would like to have for dinner they shout out “rice” in perfect harmony. If they would get to choose they would always have rice, even for breakfast. No need for me to test the waters with ‘classic European kid’s dishes’ like Spaghetti with ‘red sauce’. None of our kids would touch them.

Gohan means rice and meal

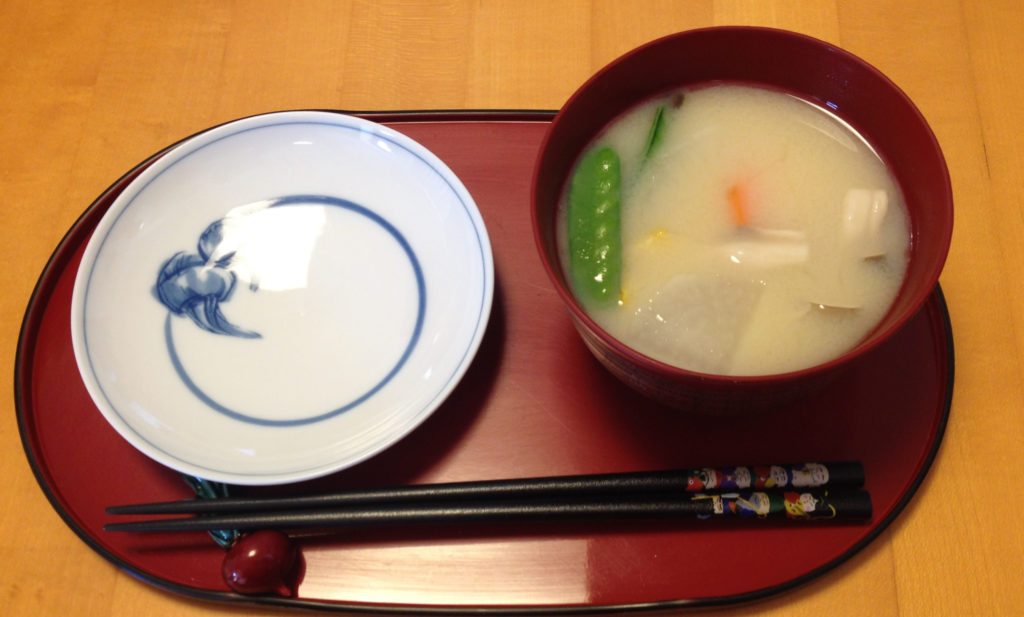
The taste of freshly cooked rice is truly delicious and I can think of no Japanese person who would disagree with that. But rice is not just a side dish. ‘Gohan’, the Japanese word for rice also means meal and as such it represents the significance of rice in Japan where it is always put onto the ‘place of honor’ (the lower left) in the traditional meal setting.

IMG_1410
Ichi-ju-san-sei: A traditional Japanese meal consisting of one (ichi) soup (ju), three (san) dishes (sei) and rice

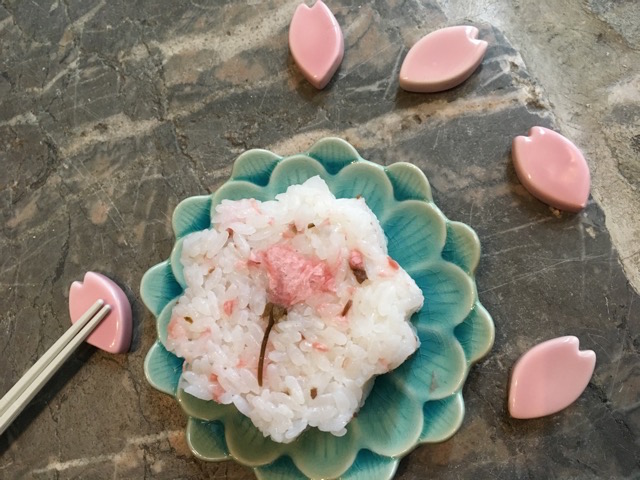
Onigiri instead of sandwich

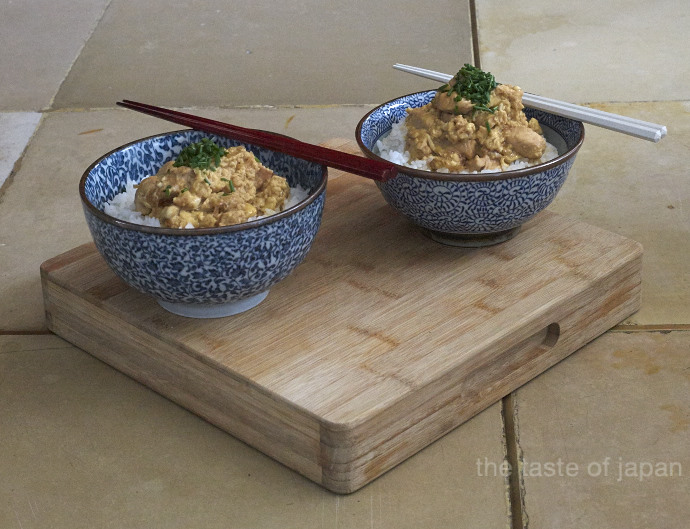
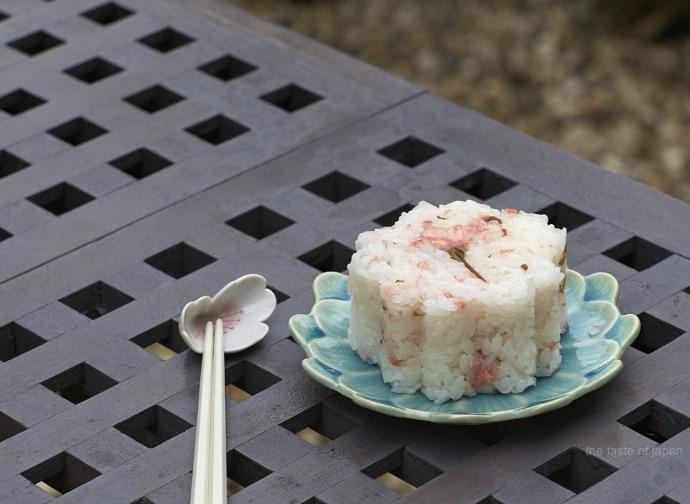
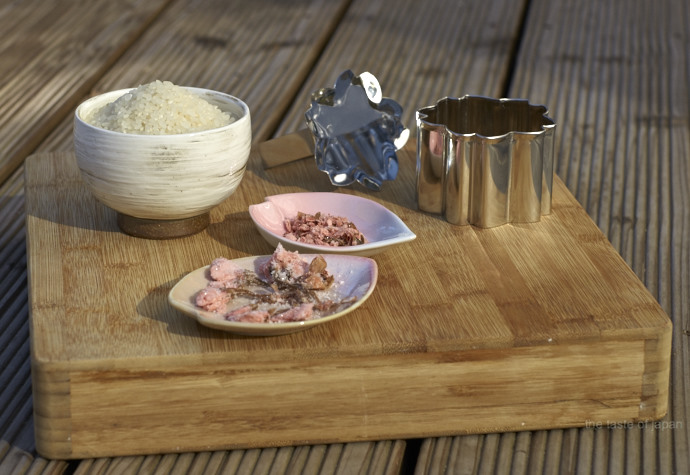
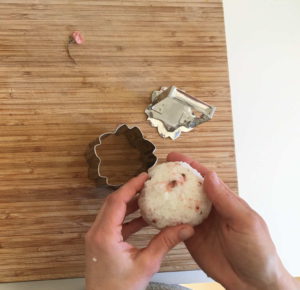
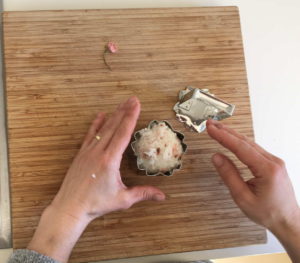
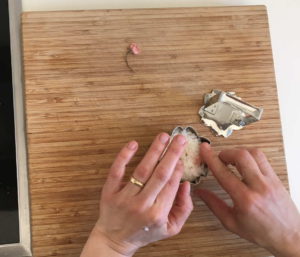
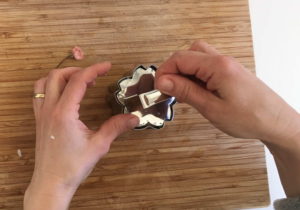
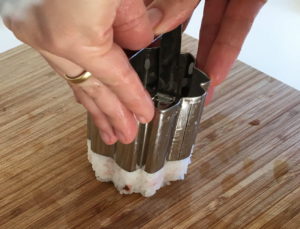
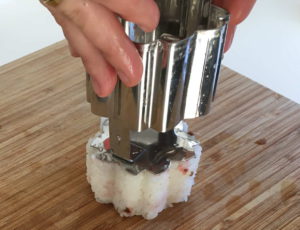
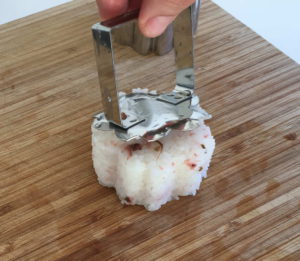
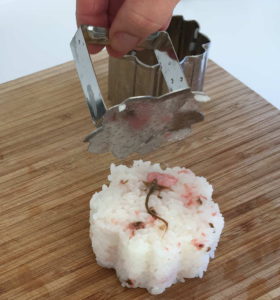
Serving my girl’s preference for rice, they usually find Onigiri, also referred to as Omusubi, in their lunchbox. Onigiri are small pressed rice ‘balls’, typically in the shape of a triangle with different seasonings and fillings. Small, affordable and convenient to take with you as an instant, delicious way to satisfy your hunger.

Yukari Onigiri with umé boshi
Onigiri with umé boshi (pickled plum)

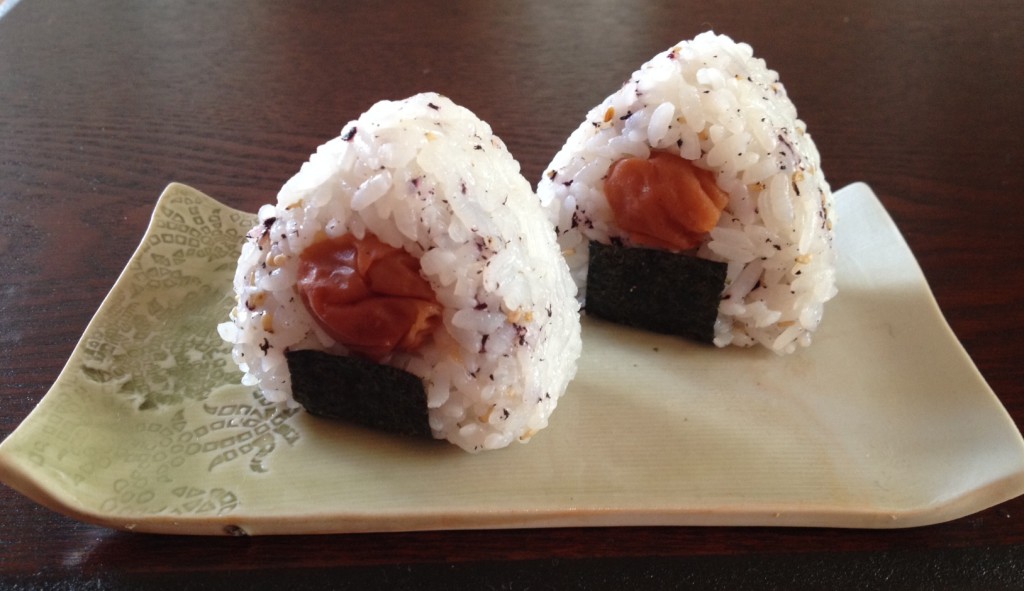
In Japan Onigiri are practically sold on each corner, whether in a convenience store or dedicated stalls. Like their Japanese peers, my girls were started on Onigiri as a baby, which probably explains their food preference. Outside of Japan there isn’t the luxury of getting an Onigiri on the way, but given that it is healthy, delicious and convenient, it is worthwhile making them yourself. But before we start with how to make Onigiri we have to start with how to cook proper rice.

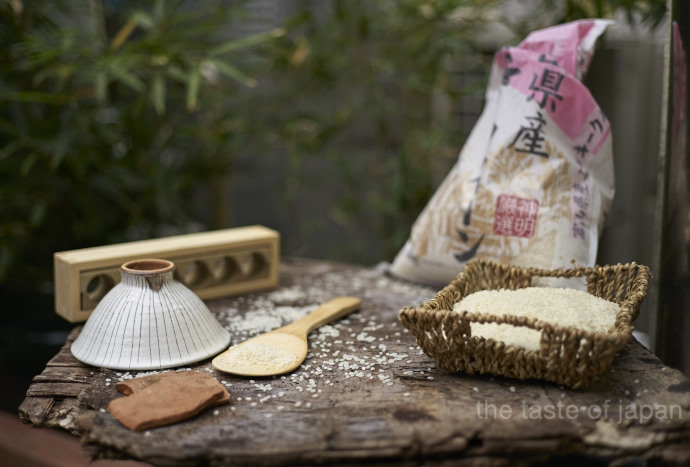
Cooking Japanese Rice

Generally speaking you can cook rice on a stove or with a rice cooker. I know that I could go into more detail about the type of pots and the type of heat sources, but that would take me too far.

Using a rice cooker with a warmer feature has the advantage of cooking rice independent from when you need it. Wonderful fur busy people or late riser that don’t want to miss out on freshly cooked rice in the morning e.g. to make Onigiri. Not speaking of being a regular life saver for me in getting a meal on the table in less than 10 minutes (see recipe here).

Using a rice cooker is pretty straight forward, but for those who prefer a step-by-step guide for its use I recommend an article that Daniela from NipponInsider wrote on it (in German only). In that article she also took a closer look at the different technical features of today’s rice cookers, so if you consider buying one and can understand German, hop over and have a look.

As convenient as rice cookers are, rice can be cooked equally to perfection on a stove, which I will introduce to you in detail below.

Things worth knowing when cooking Japanese Rice

Independent from your method of preparation, when it comes to Japanese rice there are a few things to keep in mind:

  1. Wash the rice thoroughly
    The objective is to remove any dirt, but even more the ‘nuka’ (rice bran) that would cause the rice to become mushy.

    Washing Rice
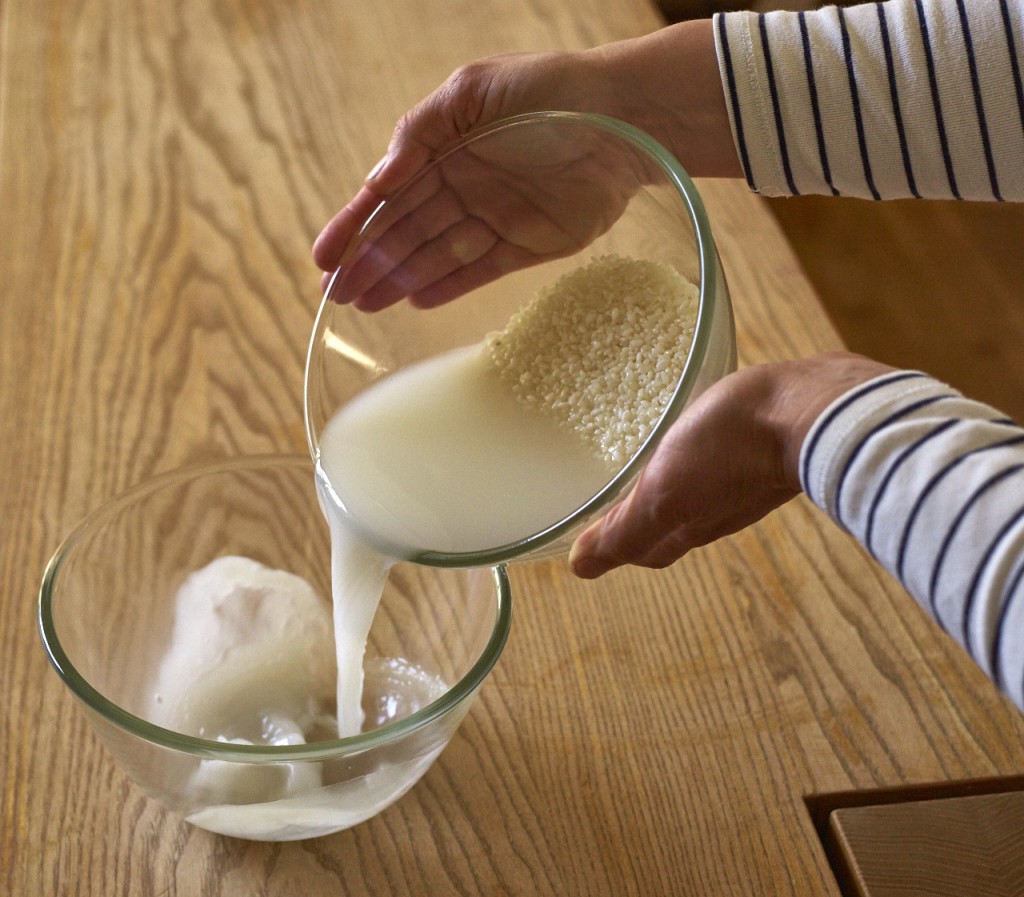
    Japanese rice needs to be washed thoroughly before cooking. The starchy water is called togi jiru and has many culinary and non-culinary uses

    In order to do so wash the rice in a bowl with cold water, gently rubbing the grains against your palms or the side of the bowl. Change the water and wash again. Repeat until the water runs clear. Drain the rice in strainer.
    The cloudy water that you get not just has a name (‘togi jiru’), it also has various culinary and non-culinary uses. Check them out here, before you throw it out.

  2. Regulate humidity of the grains
    Rice expands when absorbing water, but not uniformity.

    Dried Rice
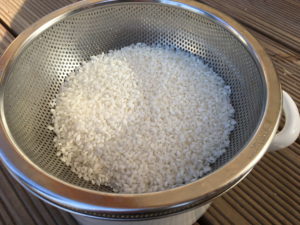
    Let the rice sit for a while after washing to help regulate moisture content and avoid cracking

    Some parts of the grains absorb water faster than others and as such fast changes in humidity and temperature lead to cracked rice grains, which then would get mushy in the cooking process. To avoid cracks you should

    Soaking Rice
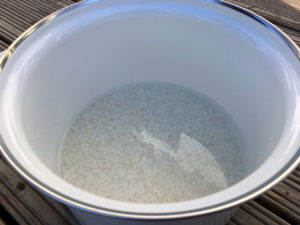
    Soaking rice additional 10-15 minutes before cooking also prevents cracking

    a) let the rice sit in the strainer for about 30 Minutes after washing and afterwards
    b) let the rice sit for another 10-15 Minutes in the water of the rice cooker or the pot before turning on the heat.

Recipe for 2 cups cooked Japanese Rice

Ingredients

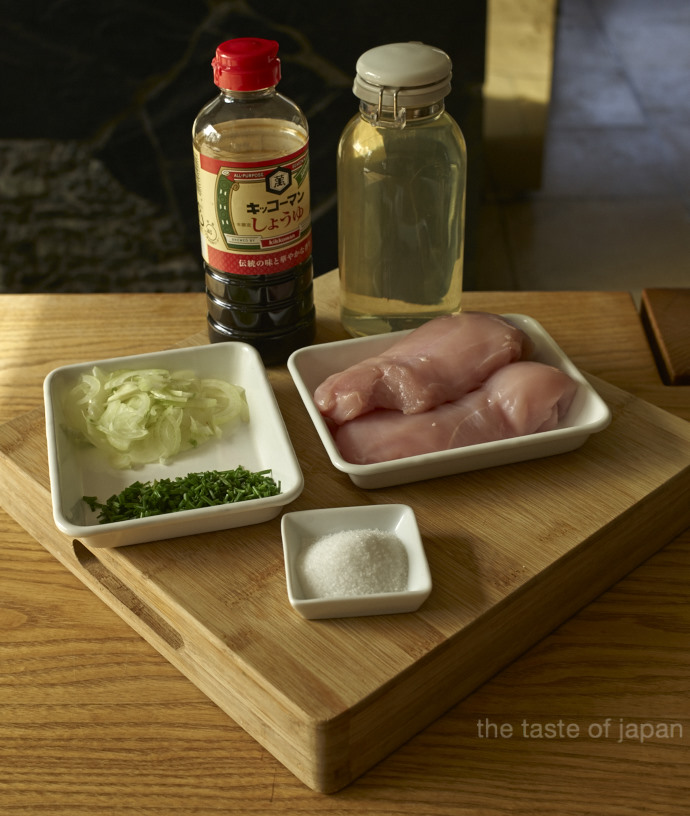
  • 1 cup (200ml)  Japanese rice
  • 220 ml             Water

Method

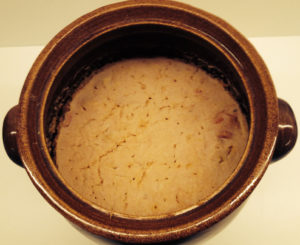
An important matter upfront: Even though you might be tempted, do not lift the lid until the full cooking process is completed (I jut did it to get you the pictures)!!!

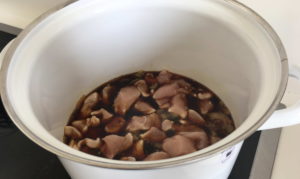
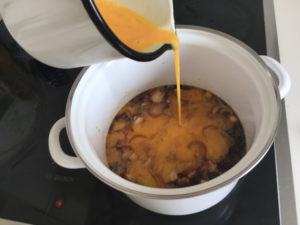
Place the washed and soaked rice with the water in a heavy (2-3l)-pot and Cooking Rice
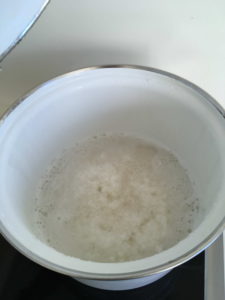
a closed lid on the stove and bring it to a boil on high heat. You can easily hear the water boiling and usually the lid starts to move as well.

Reduce the heat to medium and let the rice absorb the water completely. This takes about 5 minutes and even though you might think that this is hard to notice without peaking into the pot, rely on your ears. You will hear a fizzling sound that indicates the full absorbance. Steaming Rice
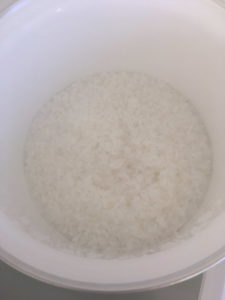
Now put your rice again on high heat, but only for a moment (about 30 seconds), before you take it off the stove and have it self-steam for another 10 to 15 minutes. Do not omit the self-steaming. It is important for the texture.

Fluff your rice with a shamoji (Japanese Rice paddle), serve and enjoy! And as we are all set now to start with how to make Onigiri, subscribe to our newsletter to make sure not to miss a recipe.

Oyakodon 親子丼: Chicken and Egg on Rice

It has been quite a while since I packed all my belongings in a dark blue Golf and left to move into my first apartment – some 630 km away from home. Until then it was always my mom, who had decorated the house for Easter and encouraged us to help paint the eggs that she prepared. Now I am a mom myself, but having lived in non-Christian countries for the past decade I have not blown an egg for my kids so far. Until my oldest came home from school last week. Excited that she is supposed to bring a box of blown eggs.

With so many eggs and some chicken we still had in the fridge we decided to make Oyako-Donburi (rice bowl with chicken and egg – in short: Oyakodon) for dinner. An easy, fast and satisfying meal.

Iain Ingredients for Oyakudon (without sake and mirin)
Main Ingredients for Oyakodon (without Sake and Mirin)

Donburi is a popular dish in Japan. Actually Donburi means bowl, but it refers to a bowl of rice with a topping on it. The most popular donburis at our home are Gyudon (beef), Maguro (tuna) and Oyakodon. Means ‘mother and child’-rice bowl and is made from braised chicken, eggs and onions.

Recipe for 2 big Bowls

Ingredients

  • 3 cups (á 200ml) Japanese rice
  • 200g      Chicken breast (in bite-size pieces)
  • 1              Onion (sliced or cut into narrow wedges)
  • 4                 Eggs
  • 100ml     Dashi
  • 30 ml     Soy Sauce
  • 15 ml      Mirin
  • 15 ml      Sake
  • 1 Tbsp.   Sugar
  • 2 Tbsp.   Roughly chopped Mitsuba (Japanese Parsley) or finely cut chives
  • A dash   Shichimi (Japanese chilli powder) – optional

Method

Wash the rice thoroughly and cook it in a rice cooker or on the stove. When the rice is done cooking, take a big spoon or a Shamoji (a rice paddle made from wood or plastic) and quickly loosen up the rice. Close the lid and let it steam while you prepare the topping.

Oyakodon: Simmering Chicken and Onions

Whisk the eggs without incorporating too much air to save the silky texture. Pour soy sauce, dashi, sake and sugar in a pan and bring to a simmer. Add the onions and the chicken and cook until the chicken is almost cooked through (approx. 3 min., depending on the size).

Oyakodon: Adding the Eggs

Reduce the heat and add the eggs in circular motions covering the entire pan. Cook the eggs without stirring to your desired doneness. Shake the pan now and then to avoid the chicken to stick to the pan.

To serve put half on the rice in one bowl, arrange the chicken-egg-mixture on top and garnish with some Mitsuba,  chives and Shichimi if you like.

It didn’t come on a surprise that my other two daughters came home with a similar request. So by now I have mastered to blow out eggs in a short amount of time and we were left with a lot of egg-mixture. But we didn’t always make Oyakodon with it. A pretty popular dish among children is Tamagoyaki, the rolled omelet. Another staple food at our home. Stay tuned for the recipe and some tips and tricks on how to get the roling part right.


Cherry Blossoms in Rice: Sakura Gohan

Breathtaking beautiful, but only for a short moment. Cherry-blossoms are known for its short but brilliant blooming season, a natural process that not only symbolizes the start of spring but also metaphorically describes transience of human life. Two weeks until the delicate pink and white petals return to earth like snowflakes in the wind.

Last year I wrote about the Japanese custom to serve cherry blossom tea at weddings. Every time I remember that custom I am filled with the grace of Japanese politeness, which you can glean here.

A different and very common culinary use for salted cherry blossoms is sakura gohan (rice mixed with salted cherry blossoms). Wonderful to take with you for a Hanami picnic, but equally wonderful to be served at home for dinner. For tonight I decided to double the cherry blossom experience and shape our sakura gohan into a cherry blossom itself.

Cherry Blossoms Kirschblüten Reis


The cherry blossom mold equals one portion of rice which is about ½ a Japanese cup (100ml) of uncooked rice. Due to the salt the rice keeps well at room temperature, so you can easily make the sakura gohan cherry blossoms ahead of time and keep it covered at room temperature until the rest of the food is ready to eat.

Rice with cherry blossoms: Ingredients (Japanese rice, salted cherry blossoms, rice mold)
  • ½  200ml-cup             Japanese rice
  • 120 ml                          Water
  • 1 Tbsp.                         Chopped, salted cherry blossoms
  • 1                                    salted cherry blossom for decoration (optional)

Method for making cherry blossom rice

Wash the rice well, cook it in a rice cooker or on the stove and leave it to steam with the lid closed for another 15 to 20 minutes after it is done cooking.

Making of cherry blossom rice 1: Sprinkle chopped cherry blossoms onto the cooked, hot rice
Sprinkle chopped cherry blossoms onto the cooked, hot rice

Shake off some of the salt from the cherry blossoms and chop them finely. Keep the salt for another use (remember mottainai – nothing goes to waste in the Japanese kitchen). The salt from the cherry blossoms has a wonderful scent and tastes delicious as a finishing salt on grilled fish.

Making of cherry blossom rice 2: Forming a ball of rice
Forming a ball of rice

After the rice is done steaming you should fluff it up and sprinkle the chopped cherry blossoms on top. Now you carefully work the cherry blossoms in the rice, ideally using a shamoji (a plastic or wooden spoon for rice). Make sure to use cutting and folding motions to avoid the rice to become mush. That’s it. Serve your sakura gohan directly in rice bowls or shape them to your liking into onigiris, logs or cherry blossoms.

Making of cherry blossom rice 3: Put the rice in the wet (!) rice mold
Put the rice in the wet (!) rice mold

Introducing onigiri in more detail has long been on the editorial schedule for this blog. So if you are interested to read about the different kinds of onigiri, how to make them and some of the fillings, I invite you to subscribe to the newsletter.

In order to make sakura gohan in the shape of a cherry blossom you need to have a cherry blossom mold.

Making of cherry blossom rice 4: Make sure to gently press the rice in the corners
Make sure to gently press the rice in the corners

Make sure that both – your hands as well as the mold are wet, otherwise the rice will stick to both and shaping it neatly will not be possible. Gently form a ball with the rice in your hands and drop it into the mold. Use your fingertips to help the rice into the corners, put on the lid and apply gentle pressure.

Making of cherry blossom rice 5: Gently press down the rice
Gently press down the rice

Lift the lid and double check that the rice fills the entire mold. Decorate the top with a single cherry blossom if you like and give the rice a final, gentle press with the lid. To release the rice from the mold hold the lid down with your thumbs while your fingers lift the mold up. Now wiggle off the lid to make sure not to ruin the shape and serve your sakura gohan-cherry blossom.

See the pictures below for more details on the process:

Making of cherry blossom rice 6: Add one cherry blossom for decoration (optional) and give the rice a final press
Add one cherry blossom for decoration (optional) and give the rice a final press
Making of cherry blossom rice 7: Lift the lid body of the mold with your fingers while pressing down the lid with your thumbs
Lift the lid body of the mold with your fingers while pressing down the lid with your thumbs
Making of cherry blossom rice 8. Take off the body of the rice mold
Take off the body of the rice mold
Making of cherry blossom rice 9: Gently wiggle the lid of the rice mold off the rice
Gently wiggle the lid of the rice mold off the rice
Making of cherry blossom rice 10: Now its time for plating
Now its time for plating


Nothing goes to waste: Tskudani from left over kombu

It is often the little things that touch your heart. Little things that become very special for one reason or another. Little things that don’t have a real value but a history that makes them invaluable. One of those precious items that I am referring to is in my sensei’s fridge. Whenever Elizabeth is making dashi she pulls out a little plastic box, decorated with tiny flowers all over. A container that she got from a person that means a lot to her and who has also used it to store the kombu from making dashi. Each time I take my kombu from the strainer to put it in a random, ordinary container I am pulled back into Elizabeth’s kitchen and I can hear her say ‘when the lid doesn’t fit anymore it is time to do something with it’.

Yukari: already powdered on the left and sun dried after making my ume-boshi (pickled plums)
Yukari: Already powdered on the left and sun dried after making my ume-boshi (pickled plums) on the right

Saving the kombu when you make dashi is a very good idea. Not only is it frugal and serves Japanese sense of Mottainai*, you would also miss out on a wonderful opportunity to create something delicious. As I mentioned last week, this time I remembered to take pictures when making a staple food from left over kombu in my house: Tskudani. A soy-simmered kombu relish that I paired with some of my girls’ most favorite seasoning: Yukari.

Ingredients: Kombu, Soy Sauce, Mirin, Sugar and Yukari (not pictured: sake and vinegar)
Ingredients: Kombu,  mirin, sugar, soy sauce and yukari (not pictured: sake and vinegar)

Ingredients for 1 jar Tskudani (ca. 100 ml)

Step 1: Tenderizing the kombu

  • ca. 6-7 pieces Kombu (each ca. 5 x 10 cm) from making dashi
  • 500 ml Water
  • 50 ml (ordinary/ low grade) vinegar

Step 2: Making the Relish

  • Tenderized Kombu from step 1
  • 1 tsp Sugar
  • a good Splash of sake
  • 50 ml Mirin
  • 60 -70 ml Soy sauce
  • 1 EL Yukari powder

Method

For the first step cut the kombu into bite size pieces.

Left over combo from making dashi
Left over kombu from making dashi

I usually cut my kombu into 2 cm squares when preparing it with yukari, Bring the water to a boil over high heat (ideally in a non-reactive pan). Add the vinegar and the kombu and cook for about 5-6 minutes or until you can pinch it easily with a fingernail. I find the kombu from Japan needs less time than the kombu from Korea that I bought in Germany, so be prepared to check doneness of your kombu a few times more when you do this dish for the first time, When the kombu is tender, drain and rinse thoroughly with cold water.

Kombu cut into bite-size pieces

Put the kombu from step 1 in a clean pot and add sake, mirin and soy sauce. Simmer over low heat, reducing the liquid until it is almost gone. Pay close attention, because this happens quite quickly and has a tendency to scorch. When the kombu is glazed, add the yukari and transfer it into a clean glass jar.

__________________

Mottainai (もったいない?, [mottainai]) is a Japanese term conveying a sense of regret concerning waste. The expression “Mottainai!” can be uttered alone as an exclamation when something useful, such as food or time, is wasted, meaning roughly “what a waste!” or “Don’t waste. … Mottainai has been referred to as a tradition, a cultural practice, and an idea which is still present in Japanese culture, which has become an international concept…”

Source: Wikipedia

Miso Soup: The difference between good and great

Last week I wrote about the beauty of a steaming bowl of miso soup, but realized that I haven’t given you a recipe for miso soup yet. The good news is that you are already 90% there if you know how to make good dashi. The basic stock that is heart and soul of Japanese cuisine. Good dashi is important and if you ever wondered why your miso soup didn’t taste great in the past, dashi is the first thing I advise you to look at. Even though making dashi is easy and fast, there are few tips and tricks you want to be aware of to take it from good to great. Take a moment to look at the recipe and the instructions here, in case you haven’t had a chance to read it yet.

Some of my favorite miso from Osaka

The basic miso soup, also called misoshiru, is made from two ingredients: dashi and miso. And you can add whatever you like or have in your fridge/pantry (see below for ideas). No other seasonings necessary, especially no additives and certainly no MSG ((monosodium glutamate) or other flavor enhancer! So if you have used miso soup or instant dashi in the past you are in for a treat.

Not convinced because Katsuo Bushi (bonito flakes) are relatively expensive outside of Japan? Your are right, the prices that I have seen were quite high, but this wouldn’t be an article from me if I wouldn’t point out that nothing goes to waste in the Japanese kitchen. And as such both, the Kombu and the Katsuo Bushi can be reused to make other dishes, which makes the price more bearable. In fact I made Furikake (a seasoning for rice) and Tskudani (a relish) just this week and this time I remembered to take pictures, so you will get the recipes soon on this blog. If you haven’t already, subscribe to the weekly newsletter and you won’t miss them.

In contrast to eating Japanese food at room temperature, miso soup is always served piping hot, so it is the last thing that you prepare for your meal. But don’t be tempted to prepare miso soup ahead of time and quickly bring it to a boil just before you are ready to eat. You would destroy not only the flavor but also the nutrients. You can and should make the dashi, ahead of time and you can pre-cook the vegetables in it early on as well, but the key to good miso soup is to add the miso at the very end, and don’t let it come to a boil after that.

Ingredients for 1 miso soup (ca. 250 ml)

  • 250 ml         Dashi
  • 1 EL             Miso
  • extra ingredients, cut into bite size pieces

Method

Miso varies widely in consistency, flavor and saltiness. Especially the salt level is what you should be aware of when making your miso soup. The worst thing you can do is to add too much in the beginning. The general rule of thumb is about 1 El per ¼ l (250 ml) dashi, but with a very salty red miso you might need less.

My miso koshi with a whisk

Heat up the dashi, and simmer any hard ingredients, such as potatoes or carrots. Add the softer ingredients that only need a short cooking time like e.g. tofu just before (ca. 1 min) the hard ingredients are tender. Take the dashi, from the heat to add the miso to the soup.

While the dashi, heats up add the ingredients into the soup bowls that don’t need extra cooking time, but will be refined through the retained heat of the soup (e.g. reconstituted wakame seaweed).

Final Dish
Final miso soup with wakame, turnip, carrot and chives

Add the miso when you are ready to serve the soup. There are two common ways to do that. One is to mix the miso with a bit of the hot dashi, in a ladle or bowl until the miso is dissolved and stir it into the soup afterwards. I prefer to use a miso koshi (a fine, deep strainer with a long handle) and an ordinary whisk. I take out the miso from the pack with a clean whisk and mix it directly into the soup through the miso koshi. Both ways avoid lumps in the soup. Ladle the soup in the bowls and serve immediately.

Ideas for Ingredients according to their cooking time*

Directly into the soup bowl

Short cooking time

Long cooking time

Reconstituted wakame Fresh Tofu Potatoes, sweet potatoes
Tops of enoki mushrooms Stems of enoki mushrooms Fresh shiitake mushrooms
Chives Green onion Leek
Mitsuba, young celery greens Snow peas Green beans

*The exact cooking time varies according to the size of the cut vegetable.

Five Points to remember:

  1. Take good dashi
  2. Add the ingredients to the dashi, or soup bowl according to their cooking time
  3. Remember that each miso has a different salt level and start with less miso than you think is necessary
  4. Dissolve the miso before putting it into the soup or use a miso koshi
  5. Never let miso soup boil after adding the miso and serve it immediately

What can you do with old Miso?

A steaming bowl of miso soup – for the most Japanese a piece of home and the essence of nourishment. A steaming bowl of evoking memories of childhood, family and tradition. It is likely that the number of ‘traditional’ miso soups equals the number of families in Japan and every sip of that soup functions like a time machine back into mom’s kitchen. So the ‘traditional’ miso soup is not only a nutritional powerhouse, but also full to the brim with taste and emotional memories.

A colourful bowl of miso soup

Miso is one of the two major elements in miso soup, but it is certainly not the only use for this super food. Miso is an essential staple in the Japanese diet and is widely used in preparing dips and sauces, marinades (take a look here for a recipe) or in pickling and it also lends its flavor to wonderful deserts. Even though miso is so versatile, it happens that a pack is sitting in the fridge longer than aroma-wise beneficial (yes, you should keep your miso in the fridge to slow down deterioration). So what to do which ‘old’ miso? Throw it out? Of course not, because nothing goes to waste in the Japanese kitchen!

Here and now is not the time and place for an extensive, scientific essay on miso that has filled hundreds of pages in various books (see the link to a free download below)*. But generally speaking miso is a fermented food product with the fermentation process itself having the potential to function as a natural preservative. Miso also contains quite an amount of salt that acts as a natural preservative. So all in all, miso can be kept for a long time. It will not go bad easily, but once opened it will loose its aroma rather quickly.  So when you tend to use more than one type of miso or don’t use miso on a daily basis you’ll be likely to end up with some miso sitting in your fridge longer than two weeks. For me personally two weeks is about the cut off date for the aroma, but that is personal preference. I do know people that consider four weeks to be ok for them. Test it and trust your taste to find out what works best for you.

Version 2
Pickled turnips with neri miso as a dip

Whenever you find your miso has become old, it is time to rejuvenate it. Add some aromas and some dashi to create a wonderful sauce that works as good as a dip for fresh vegetables (e.g. cucumber, celery) as it does as a scalloped topping on tofu or wheat gluten or even thinned with dashi as a sauce to pan-fried vegetables. Miso prepared this way is called neri miso and means ‘stirred miso’. It is usually made from red miso (aka miso), though i have successfully experimented with all kinds of miso. Today’s recipe is a basic version of this sauce. Stay tuned for more options how to further pimp neri miso with herbs and nuts in the coming weeks.

Ingredients for one jar (ca. 125 ml)

  • ca 100 g    red miso
  • 20-30 g     sugar
  • 30-50 ml   sake
  • 30-50 ml  water or (kombu) dashi

Method

Miso varies widely in consistency, flavor and saltiness, so the measurements for sake, sugar and water/dashi are guidelines only. When making neri miso start by using the lowest quantities and adjust consistency and taste to your liking, should it be necessary.

Version 2
Scalloped neri miso on fried tofu

Combine all the ingredients in a pot and mix them until they are blended well. If you have, use a deep pot, because the sauce tends to splatter. Reduce the sauce on medium heat, stirring constantly (!) until the consistency is creamy again. Don’t be tempted to reduce it too much, because neri miso will thicken in the cooling down process, so take this into consideration. Now is a good time to carefully (it is very hot!) taste your neri miso and adjust the flavor. Let the neri miso cool down and fill it in a clean and disinfected jar.

________________

* Tip:

  1. Add ginger juice while the neri miso cools down for a quick twist on the basic recipe
  2. If you want to dive deeper into the history, the science, nutrition of miso, you may be interested in the free pdf-download of the ‘Book of Miso’ by William Shurtleff & Akiko Aoyagi

On my way to the rising sun

Yesterday I started my first journey back to my culinary roots for 2017. I will be traveling all over Japan for the next few weeks, getting my hands on more traditional dishes, cooking techniques and ingredients. I am going to visit  a couple sake breweries and taste even more wonderful sake from different regions.

To get the most out of this culinary mission, I will not post new recipes until my feet touch German ground again. Stay tuned until I can share new insights into culinary Japan.

Kakisu: Loosing weight is a wonderful side effect

I know that I promised pictures of my Hoshigaki (dried persimmons) and a description how to make this Japanese treat at home. I am continuously documenting the progression of the drying process, but have not yet managed to write up the corresponding article. Sorry for that, I have to put you off for a bit more until I am ready to post this piece.

More exercise is the no.1 New Year’s resolution of German women, with a healthy diet and loosing weight being second and third. Well, I am not going to help you with exercising, but at least I can contribute the other two. Even a pretty yummy contribution: Kakisu (persimmon vinegar).

In Korea persimmon vinegar is rumored to be the secret weapon to loose weight easily. Busy (working) women drink a few glasses persimmon vinegar dilluted in water per day and some of them swear that nothing ever worked as good and easy in loosing weight.

Having three kids, a normal household (as much as a household can ever be normal with there little ones being intensely busy counteracting any attempt of tiding up), a garden and a job, I have neither time to exercise not to eat a lot. I wouldn’t consider myself skinny, but loosing weight has not yet appeared on my priority list. Maybe when I have more time (wonderful excuse – this way I will get around it for a looong time).

In my house making Kakisu always had culinary reasons. A fruity, yummy vinegar that I like to add to fresh and light summer dishes. My current vinegar is happily fermenting its way and should be ready in spring, just about when all the magazines start to promote the ultimate bikini-workout for the upcoming beach season. As I have it sitting around, why not test the loosing weight effect of Kakisu? I will keep you updated how it goes (without pictures :-).

Vorbereitung der Kakis
Remove calyx before adding it to the pot

Kakisu is embarrassingly simple to make. If you want to join me in my loosing-weight experiment or if you are curious about making persimmon-vinegar yourself, start your pot, before the season is over.

Ingredients for one pot

  • 4-6 kg unwashed persimmons (various kinds are as ok as various degree of ripeness)
  • 1 big fermentation pot (non-reactive) without a lid
  • 1 piece of clean cotton, big enough to cover the pot
  • 1 string, long enough to wind around the pot twice

Method

Do not wash the persimmons. The yeast on the skins is what you nee to get the fermentation process going.

Remove the calyx and stuff as many persimmons as you can cut side down in your pot (I like to put the ripe or overripe ones on the bottom to get the liquid production going fast). Put a clean cloth on top of the pot and tie it down with the string. That’s basically it.

Kakis im Gaertopf
Simple start: put persimmons in a pot, cover and wait.

From now on you should mix and squish the persimmons every two days. The first one or two times it is more of a rearranging from top to bottom than mixing. The first two or three times I usually add more persimmons, as the increasing degree of persimmon mash creates room for more persimmons to be added to the mix.

Kakis nach vier Tagen
Fermenting persimmons after four days

After about a week you should have a puree that is happily fermenting it way, forming a fruity and foamy persimmon-mash. Keep mixing every other day for another three to four weeks. Don’t forget to taste it once in a while. After about a month the persimmon-mash should start to get vinegary overtones. This is your sign to stop mixing. Let it rest to form a ‘mother’ on the surface, mature and mellow for the next three months.

Kakis nach 2 Wochen
Fermenting persimmons after two weeks

Don’t forget to taste it periodically. Once it has mellow fruity vinegar taste it is time to strain it through a piece of sarashi (Japanese fabric that today is often used in Japanese cooking), a double-layered cheese cloth or a similar cloth). Plan a couple of days for this process; because of the amount of mash, extracting the vinegar will take some time.

And of course there is another use for the persimmon-puree that is left behind in your cloth, so don’t throw it out! Store it in a lidded container in your fridge and use it to pickle daikon or turnips in it. You might also want to store a bit of it in a separate little jar as a condiment. It can be an alternative to ume boshi (Japanese pickled plums) puree. As such to a simple dish as or shio-zuke (salt pickles) as a fruity kick or spread it as a sauce on roulade and add a shiso leaf (Japanese leafy spice) before you roll it up and fry it.

漬物 Tsukemono-Workshop: Fermenting the Japanese Way

I am excited to announce that I have my first cooking workshop coming up next Saturday in Berlin at the Nion Japanese Pop-up Store in Kreuzberg. Participants will learn the basics about Tsukemono, the Japanese way of preserving and fermenting food and will get to start their own nuka-pot, a very traditional way of fermenting that can be kept for years and years.

There is still room for a few more participants, so if you live in Berlin or are in the area and want to dig into fermentation, just drop me a line (d.maas@theatsteofjapan.com). The workshop-fee includes all materials and a subsequent meal according to the Washoku-guidelines, which I will introduce in more detail during our early dinner. Please see below the flyer and more details on the upcoming workshop.

As for the nuka-pot that you should bring: you can easily find something suitable online. With a search for”Gärtopf” you’ll find various offers for glazed ceramic pots (e.g. www.gärtopf.de) or check www.emaille24.de to find an enamel lined pot similar to the one you can see on the picture.

Schnappschuss (2016-12-30 15.10.02)

What is Tsukemono

“a bowl of rice with a small plate of pickles and some soup is not merely food, but cuisine…”

Tsukemono translates to ‘pickled things’. Preserved vegetables that are staple food in the Japanese diet. But Tsukemono is so much more than simple pickling. There are a wide variety of methods that are used for ‘pickling’. Throughout history, the Japanese have found wonderfully delicious innovative ways for transforming and preserving their food.

Do you know what to expect?

In this approx. 2,5-hour workshop you will get basic skills and knowledge regarding the traditional/classical methods in preparing two different kind of Tsukemono. One will be a quick pickle that will be ready for you to taste at the end of the workshop. An easy way of fermenting that offers a myriad of variations for you to try at home. The second type is ‘nuka-zuke’, one of the most traditional Japanese Tsukemono. You will get to start your own ‘nuka-pot’ to take home with you for future fermentation in your own kitchen.

What you need to bring along

  • Knife
  • Cutting Board
  • Container with a lid that holds approx. 4-5 l and 18-20 cm diameter
    • Ideally ceramic (glazed inside) or enamel lined metal (look for a straight edged ‘Gärtopf’-type of container).
    • The container should have been washed and disinfected using boiling water prior to the workshop

Achara-zuke with Turnips and Persimmons

I did order more persimmons. Much more. Twenty kilograms, to be precise. Just about when my youngest daughter, who had been eating one big persimmon per day, decided that from now on ‘mikan’, which are mandarins, are her favorite fruits.

So now I have this big pile of wonderful fruit sitting on my terrace waiting to become something delicious. Actually a quite typical situation when you live with the seasons. Something we hardly know anymore, given the year-round-availability of products. We are used to go into the supermarket and find whatever a specific recipe calls for. If it is not in season it might be a lot more expensive and the quality might not be what we would like it to be, but you can be sure to find everything somewhere. Living with the seasons, however means that fruits and vegetables that are available are of excellent quality and taste. This is the good news. The challenge is, that over the course of a vegetable’s season you get a lot of it on your kitchen counter. The art of (Japanese) cooking is therefore not only focus on the seasons, but also to find many creative ways to transform a specific ingredient. This is nothing that happens over night. It requires a rethinking in the way we want to feed ourselves; it requires a lot of practice, joy to experiment, trial and error and patience. But it is certainly doable. You will not only be rewarded with many new dishes and an extension of your repertoire. Grocery shopping will be much faster and easier. No more frustration because the vegetables your recipe calls for are beyond their prime, or the fruits need a couple of days before they are ready to eat, but you dinner is tonight. No more remorse that the fish you are about to buy doesn’t look so appealing anymore, but it is the only one left, so you take it anyway. Living with the seasons means you take home whatever is fresh and looks appealing, knowing you can turn it into something delicious. Give it a shot, it is worth it.

So back to the 20kg persimmons on my terrace. Kaki no Shira-ae (persimmons in tofu sauce) is certainly something that my family likes to eat throughout the persimmon-season, but as much as they do, they don’t like to eat it every day. So we eat our persimmons grilled, dried, pickled, in salads, made into vinegar and maybe even as a pickle medium, because in Japan this is a way to use up overripe fruits. Regular readers of this blog know by now that I don’t get tired to mention that nothing goes to waste in a traditional Japanese kitchen. And this is – again – a wonderful example of it.

But before I will show you the pictures of my Hochigaki (dried persimmons) next week and explain how I am preparing this Japanese delicacy at home, you find a recipe for Achara-zuke (a quick sweet and sour pickle dish) using persimmons and turnips. Achara-zuke is actually a summer dish and can be prepared with lots of different vegetables, but in using fresh persimmons it becomes a winter dish.

Achara-zuke ingredients

Ingredients: Serves 4

  • 1 persimmon
  • 2 big turnips
  • ½ teaspoon Salt
  • 125 ml Achara-su* (sweet-sour vinegar)
    • 100 ml rice vinegar
    • 60 suigar
    • 25 ml dashi (for a vegan dish use kombu-Dashi)
    • ½ dried Togarashi (Japanese chili), without seeds, alternatively you can use deseeded, fresh chili

Method

Combine all ingredients for the Achara-su except the togarashi (Japanese chili) in a non-reactive pot, stir while heating it over medium heat until the sugar dissolved completely. Remove from the heat, add the togarashi and let cool to room temperature.

Achara-su in the cooling-down phase

In the meantime wash and julienne the turnips. Sprinkle them in a bowl with some salt, gently mix and let them sit for about 15 minutes to draw out the liquid. While this is happening peel and cut the persimmons into fairly thin stripes (save the peels if you are into fermenting).

Julienned turnips and persimmons (with the peels ready for drying)

Rinse and drain the turnips and gently squeeze out any excess water with your hands. They should taste slightly sweet and a bit salty and should be flexible, but still crisp. If they are too salty – rinse, drain and squeeze them again.

Achara-zuke waiting to mature

Mix the turnips with the persimmons and submerge them in Achara-su for about an hour before serving them in small dishes. When plating, I like to add a small piece of togarashi on top to alert people that it is a spicy dish.

Final dish
Final dish

______________________
* Tip: If you like Achara-zuke double or even triple the recipe for Achara-su. It keeps well and if you have it on hand preparing Achara-zuke is a matter of minutes.