Storing Water Kefir Crystals

So we are definitely hooked. Hooked on water kefir. A couple of days ago I bottled quite an amount to take on a family vacation trip, but it was gone within three days. Back home the first thing I did was starting a new batch. Four new batches to be precise. Being relatively new to water kefir I want to really understand it and as such I experimented with the way to store water kefir. Whether you are absent for a couple of days or want to have a break for a bit longer, it is good to know what works and how it will influence the end product.

How to store water kefir (for a long time)

So before we went on vacation, I made 50g-portions of the water kefir crystals and stored them in four different ways:
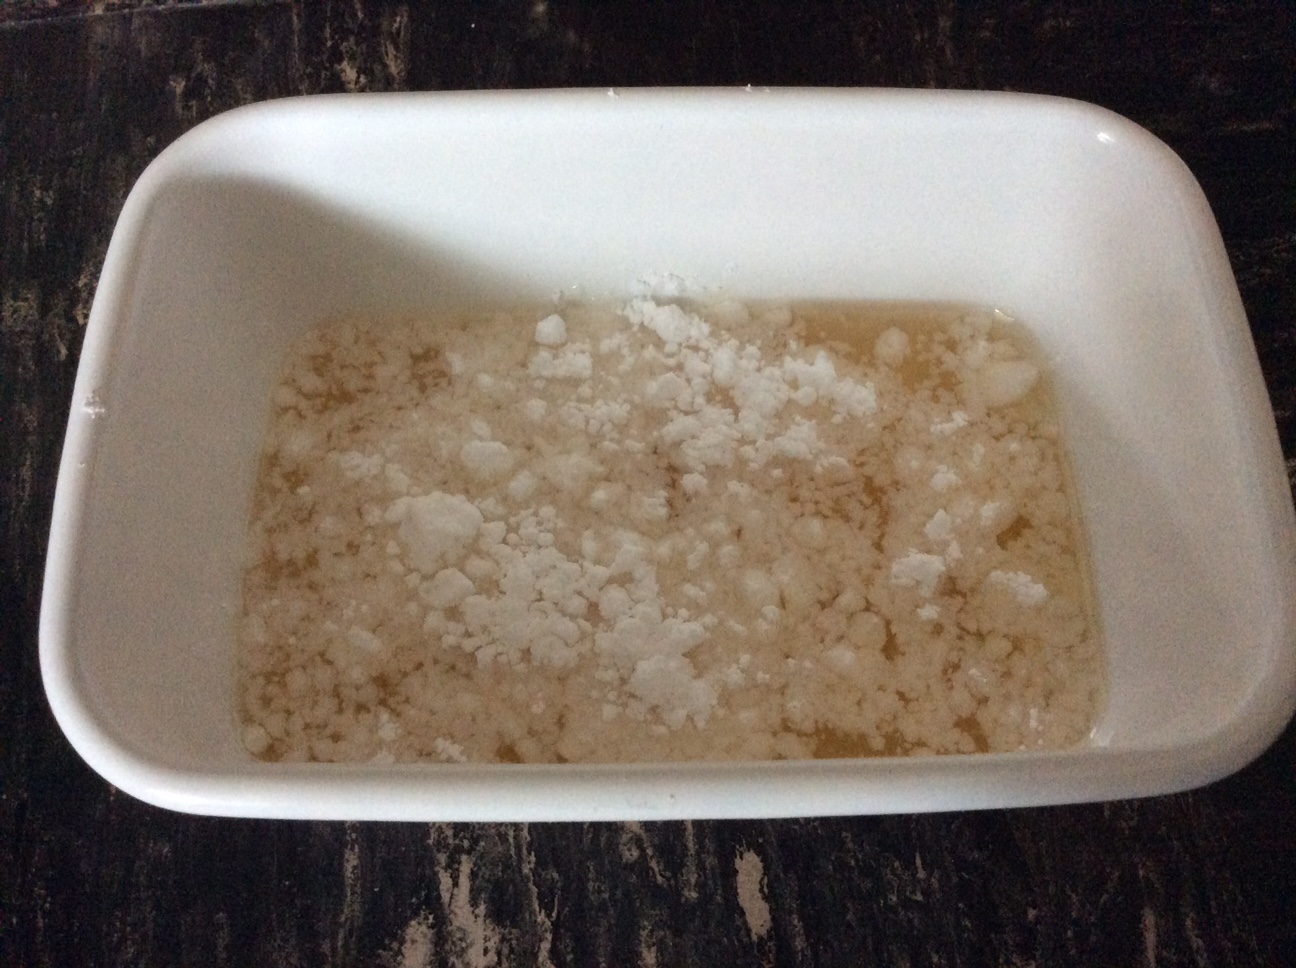
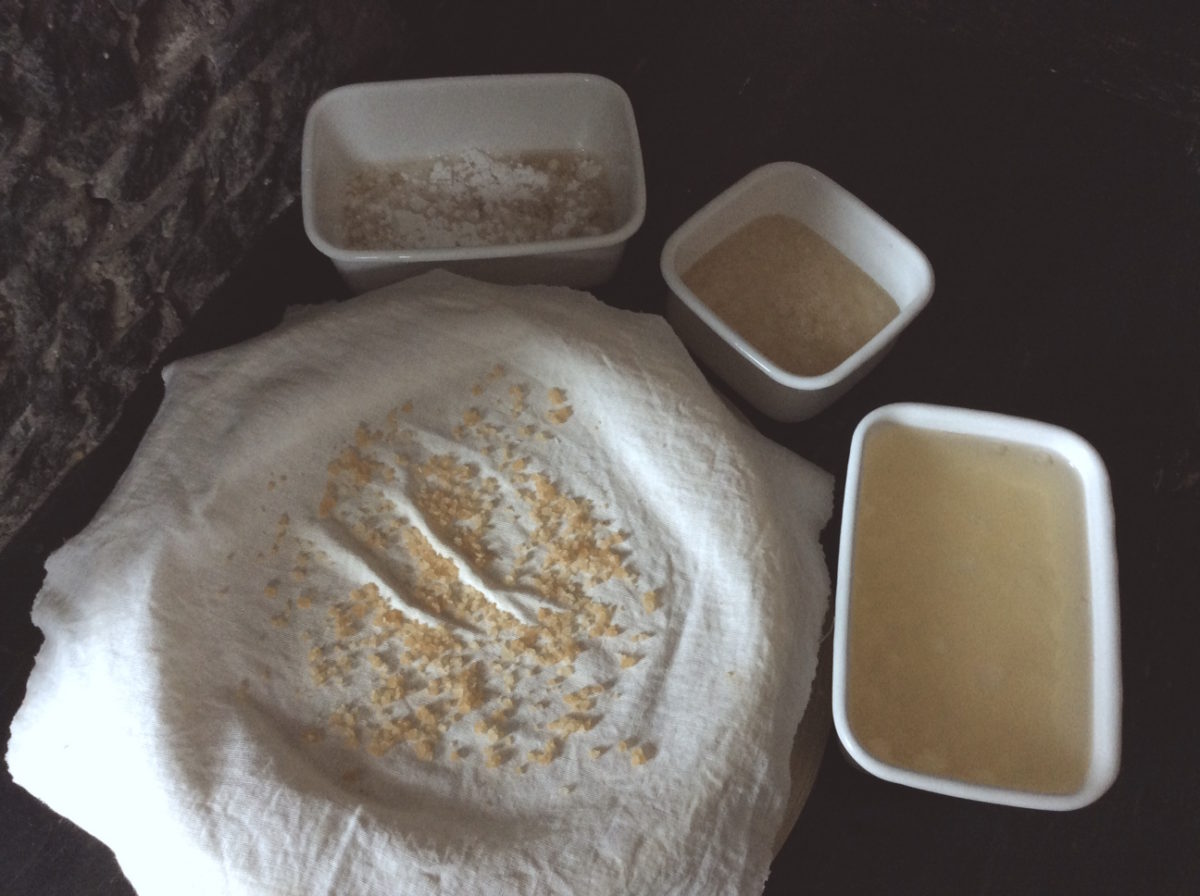
Waterkefir crystals covered with icing sugar. The sugar will melt and form a syrupy brownish liquid
  1. Fridge:
    Water kefir crystals floating in 10% sugar water in the fridge (in a loosely lidded non-reactive container),
  2. Fridge:
    Water kefir crystals covered with icing sugar (in a loosely lidded non-reactive container),
  3. Freezer:
    Freezing water kefir crystals, barely covered in 10% sugar water and
  4. Dryed:
    Water kefir crystals laid out to dry on a of clean piece of cotton, stored well aerated at room temperature
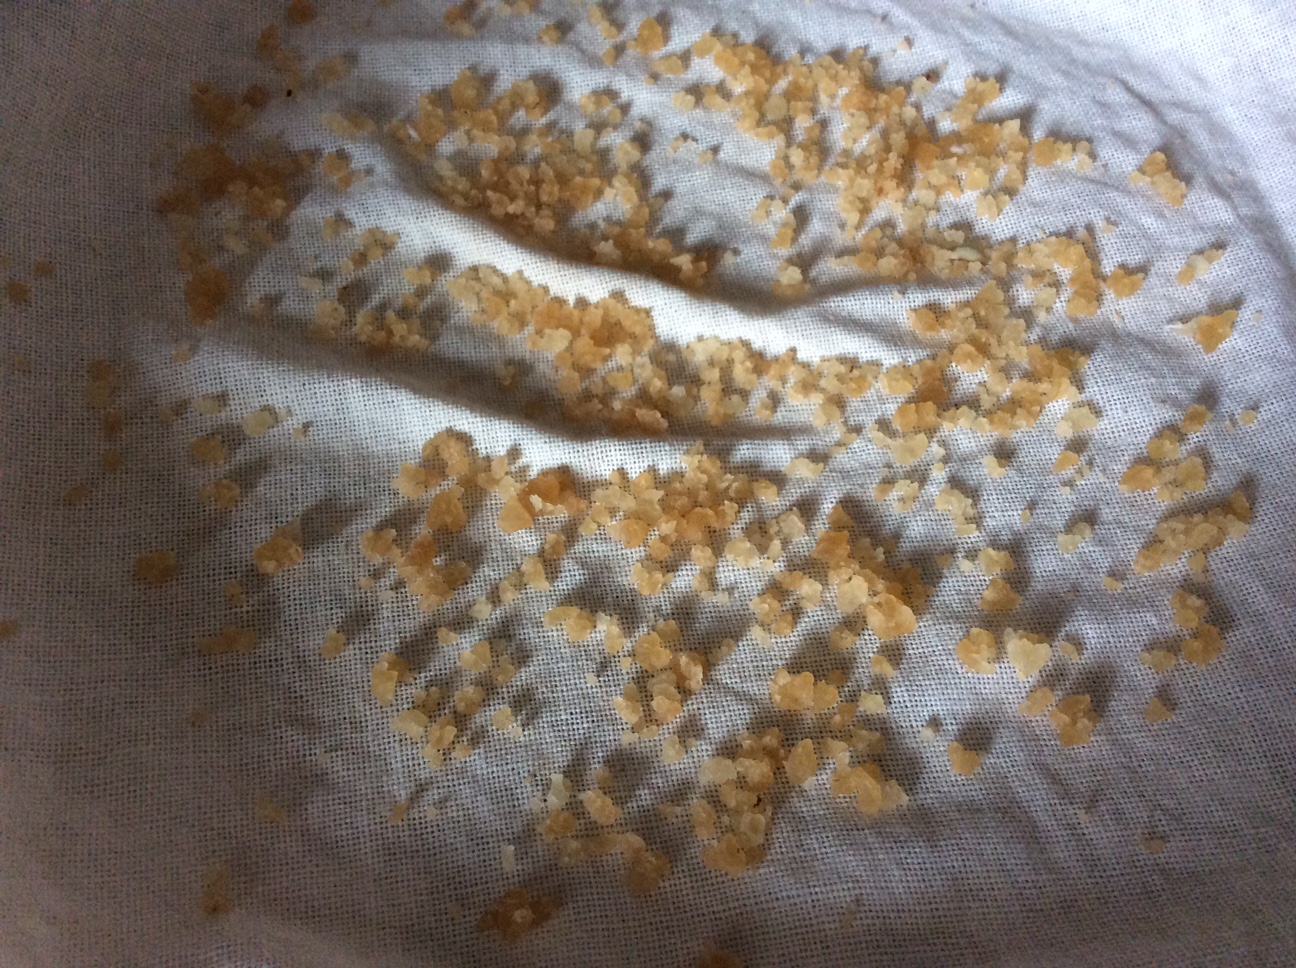
Dried water kefir crystals shrink about 80% and chance from translucent to brown

How to Reconstitute water kefir

A couple of days ago I slowly defrosted my frozen water kefir crystals and prepared four identical jars to reconstitute the water kefir, hoping for yummy lemonade at the end. Each jar contains:

  1. One liter water
  2. 80g caster sugar
  3. two dried prunes
  4. one dried fig
  5. two slices organic lemon (with the peel)

After the first 12 hours all but the pre-frozen water kefir crystals showed -although significantly restrained -definite signs of fermenting activity: carbon dioxide is rising and the crystals seem to grow and split which is normal behavior during the fermentation. After 24 hours all four jars were happily fermenting and I could test the taste of their products after 48 hours:

After 48 hours all four jars were on their way.

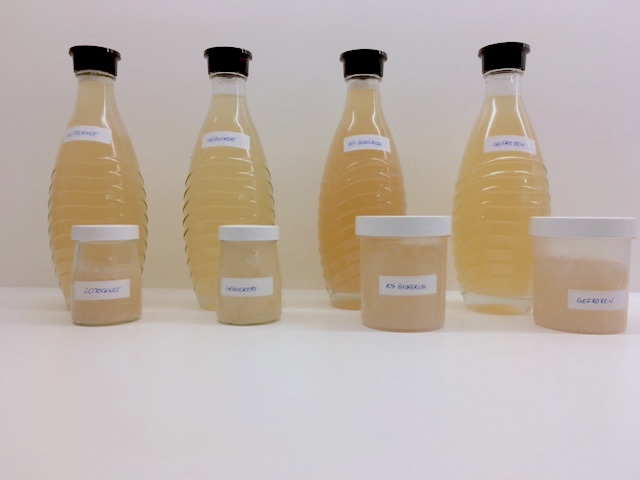
10%Sugar Water Sugared Dried Frozen
Sweet/Sour Very sour Very sweet sweet pleasant
Bitter very bitter medium bitter medium
CO2 Very low low medium medium
Amount of crystals 119g 80g 44g 126g

Outcome

Resulting water kefir after storage. Difference in taste and color

Type and  Time of Storage

All four ways of preserving water kefir crystals were successful, in the way that all of the crystals survived and could be re-activated for further fermentation. I assume that storing water kefir crystals for a long time in sugar water in the fridge might be problematic. Even though the temperature reduces the activity, is still happens and as such at some point of time the yeast will rund out of food. So i would opt for drying or freezing the crystals if the storage is intended to last for several weeks or a couple of months.

Taste and Reconstitution

In favor of comparison I used 50g water kefir crystals for each way of storing. In the end my little experiment showed that the different ways of preserving the crystals have an impact on their return to a normal activity level:

  • Using the sugar water method has practically no impact on the activity. That is the reason why the lemonade turned out too sour and almost without CO2. The 50g that I put to storage were too much for the 1l sugar water I used for reconstitution.
  • The crystals that were sored in icing sugar took a little while to get back to normal fermentation mode and as a result the residual sugar in the lemonade was unpleasantly high. Given that the possible storage time is about the same as using sugar water I do not see an advantage using this method.
  • The dried water crystals didn’t propagate well compared to the initial amount. But given that the 50g reduced to 10 after being dried, the 44g are not too bad. A reduced fermentation activity seems logic with this drastic way of preservation and the result was satisfactory.
  • Freezing water crystals works well. Initially I thought that -18 C will ultimately kill the bacteria, but due to their very slow fermentation in the beginning the 50g/1l-water ratio resulted in a very good lemonade.

Summary

As a result all water kefir crystals have survived, but only the frozen ones produced a pleasant lemonade right afterwards, whereas the first batch of the other three methods had a difficult taste. The second batches however, with the right amounts (see recipe here), were indistinguishable.

  • Water kefir crystals can easily be stored long- and short term
  • The more drastic the method (freezing/drying vs. sugar water) the slower the re-entry into fermentation mode
  • The first lemonade will most likely not have a pleasant taste, but all methods have a normal taste after that.
Japanese Water Crystal Lemonade

Our Family got bigger. Unfortunate for the grandparents and the girls it is not another baby – only water kefir. It lives happily together with all the other jars and containers that are bubbling and fermenting whatever is inside and produces continuously yummy, healthy lemonade.

Water kefir is kind of like the German ‘Hermann cake’ or the Amish Friendship Bread, that was popular when I was a kid. Except of my husband I don’t know any kid of the 70’s and 80’s that has not brought one home from school.

What is water kefir?

Also named Japanese water crystal, water kefir is a symbiosis of yeast and bacteria – similar to kombucha, that will culture sugar water in a couple of hours to make a naturally fermented homemade soda that is rich in probiotics, B vitamins and food enzymes. In its basic form the taste reminds me of bitter lemon or ‘Fedeweißer’, the partially fermented young wine that comes to the market in Europe in late September/early October.

Fermenting water kefir

To my knowledge water kefir is not produced commercially, but it is easy to get the grains online, although I found a huge difference in price. Some individual vendors hand off their grains for free if you pay postage and some commercial companies sell the same amount – 30g (enough for one liter) – for as much as 18,90€.

In the beginning you don’t need more than those 30g, because in a favorable environment (relatively hard water and enough food (sugar, nitrogen) for the yeast & bacteria) water kefir grows fast. An increase of 25% is almost happening and I have seen it doubling often as well. All you need is relatively hard water, sugar and some dried fruits.

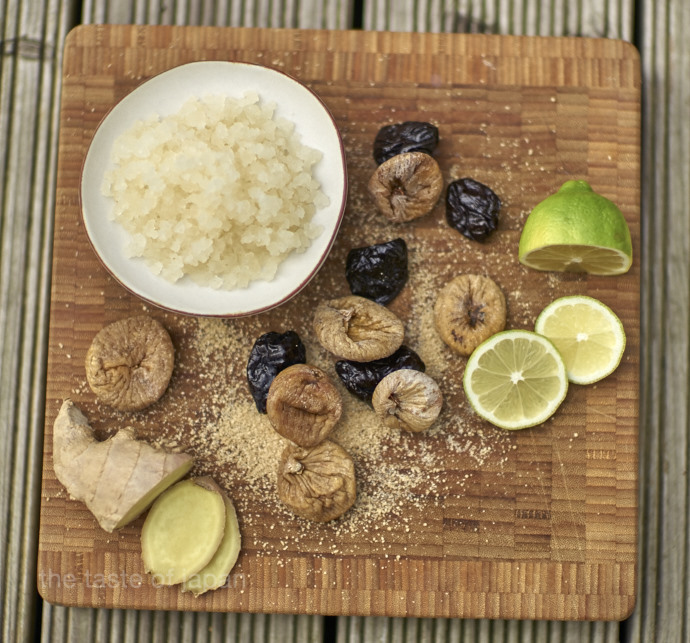
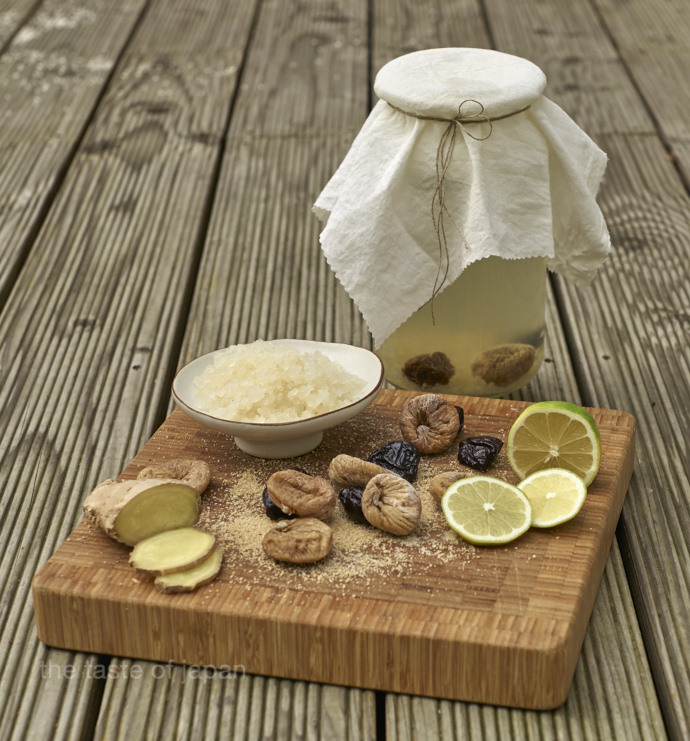
This is what I put in my water kefir the time. A mix of dried prunes and figures, raw sugar, lemon and ginger

Recipe for one liter water kefir

  • 1 liter water (25% warm water, 75% cold water)
  • 75g Sugar
  • 2 round slices of an organically grown lemon (if you don’t like a slightly bitter taste remove the peel)
  • 3 dried figs
  • 30g water kefir grains
  • glass jar that holds 1,5l (without lid)
  • clean cotton cloth
  • rubber band or string

Method

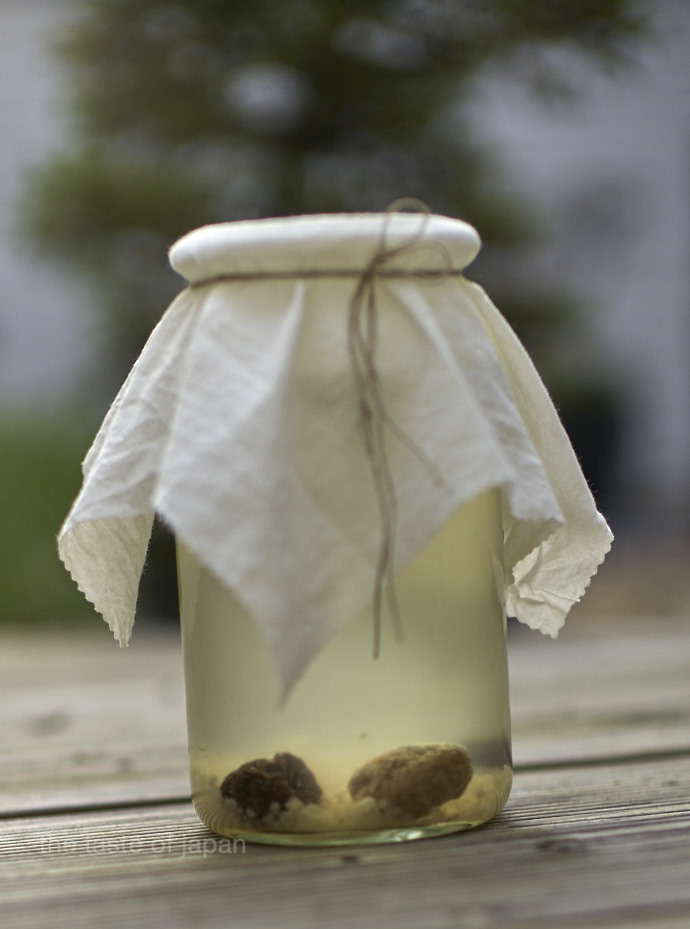
Dissolve the sugar in the warm water and mix it with the cold water to get one liter sweet water at room temperature. Put the rest of the ingredients into a clean glass jar and fill it up with the sweet water. Put a clean cotton cloth on top and secure it with a rubber band or a string, so that the developing carbon dioxide can escape Now leave it to ferment for about 48 hours at room temperature. Unlike kombucha it doesn’t need to be dark, but avoid direct sunlight.

When its done, take out the dried fruit and the slices of lemon and strain the lemonade through a plastic strainer, catching the water kefir grains. Rinse the grains and wash the jar before starting your next batch.

You can drink your lemonade right away or fill it in glass bottles and put it into the fridge for a second fermentation. The remaining micro-organism will ferment the slower than the water kefir grains, so it is safe to put a lid on the bottle. Trapping the carbon dioxide during the second fermentation results in a refreshing, nicely prickly lemonade!

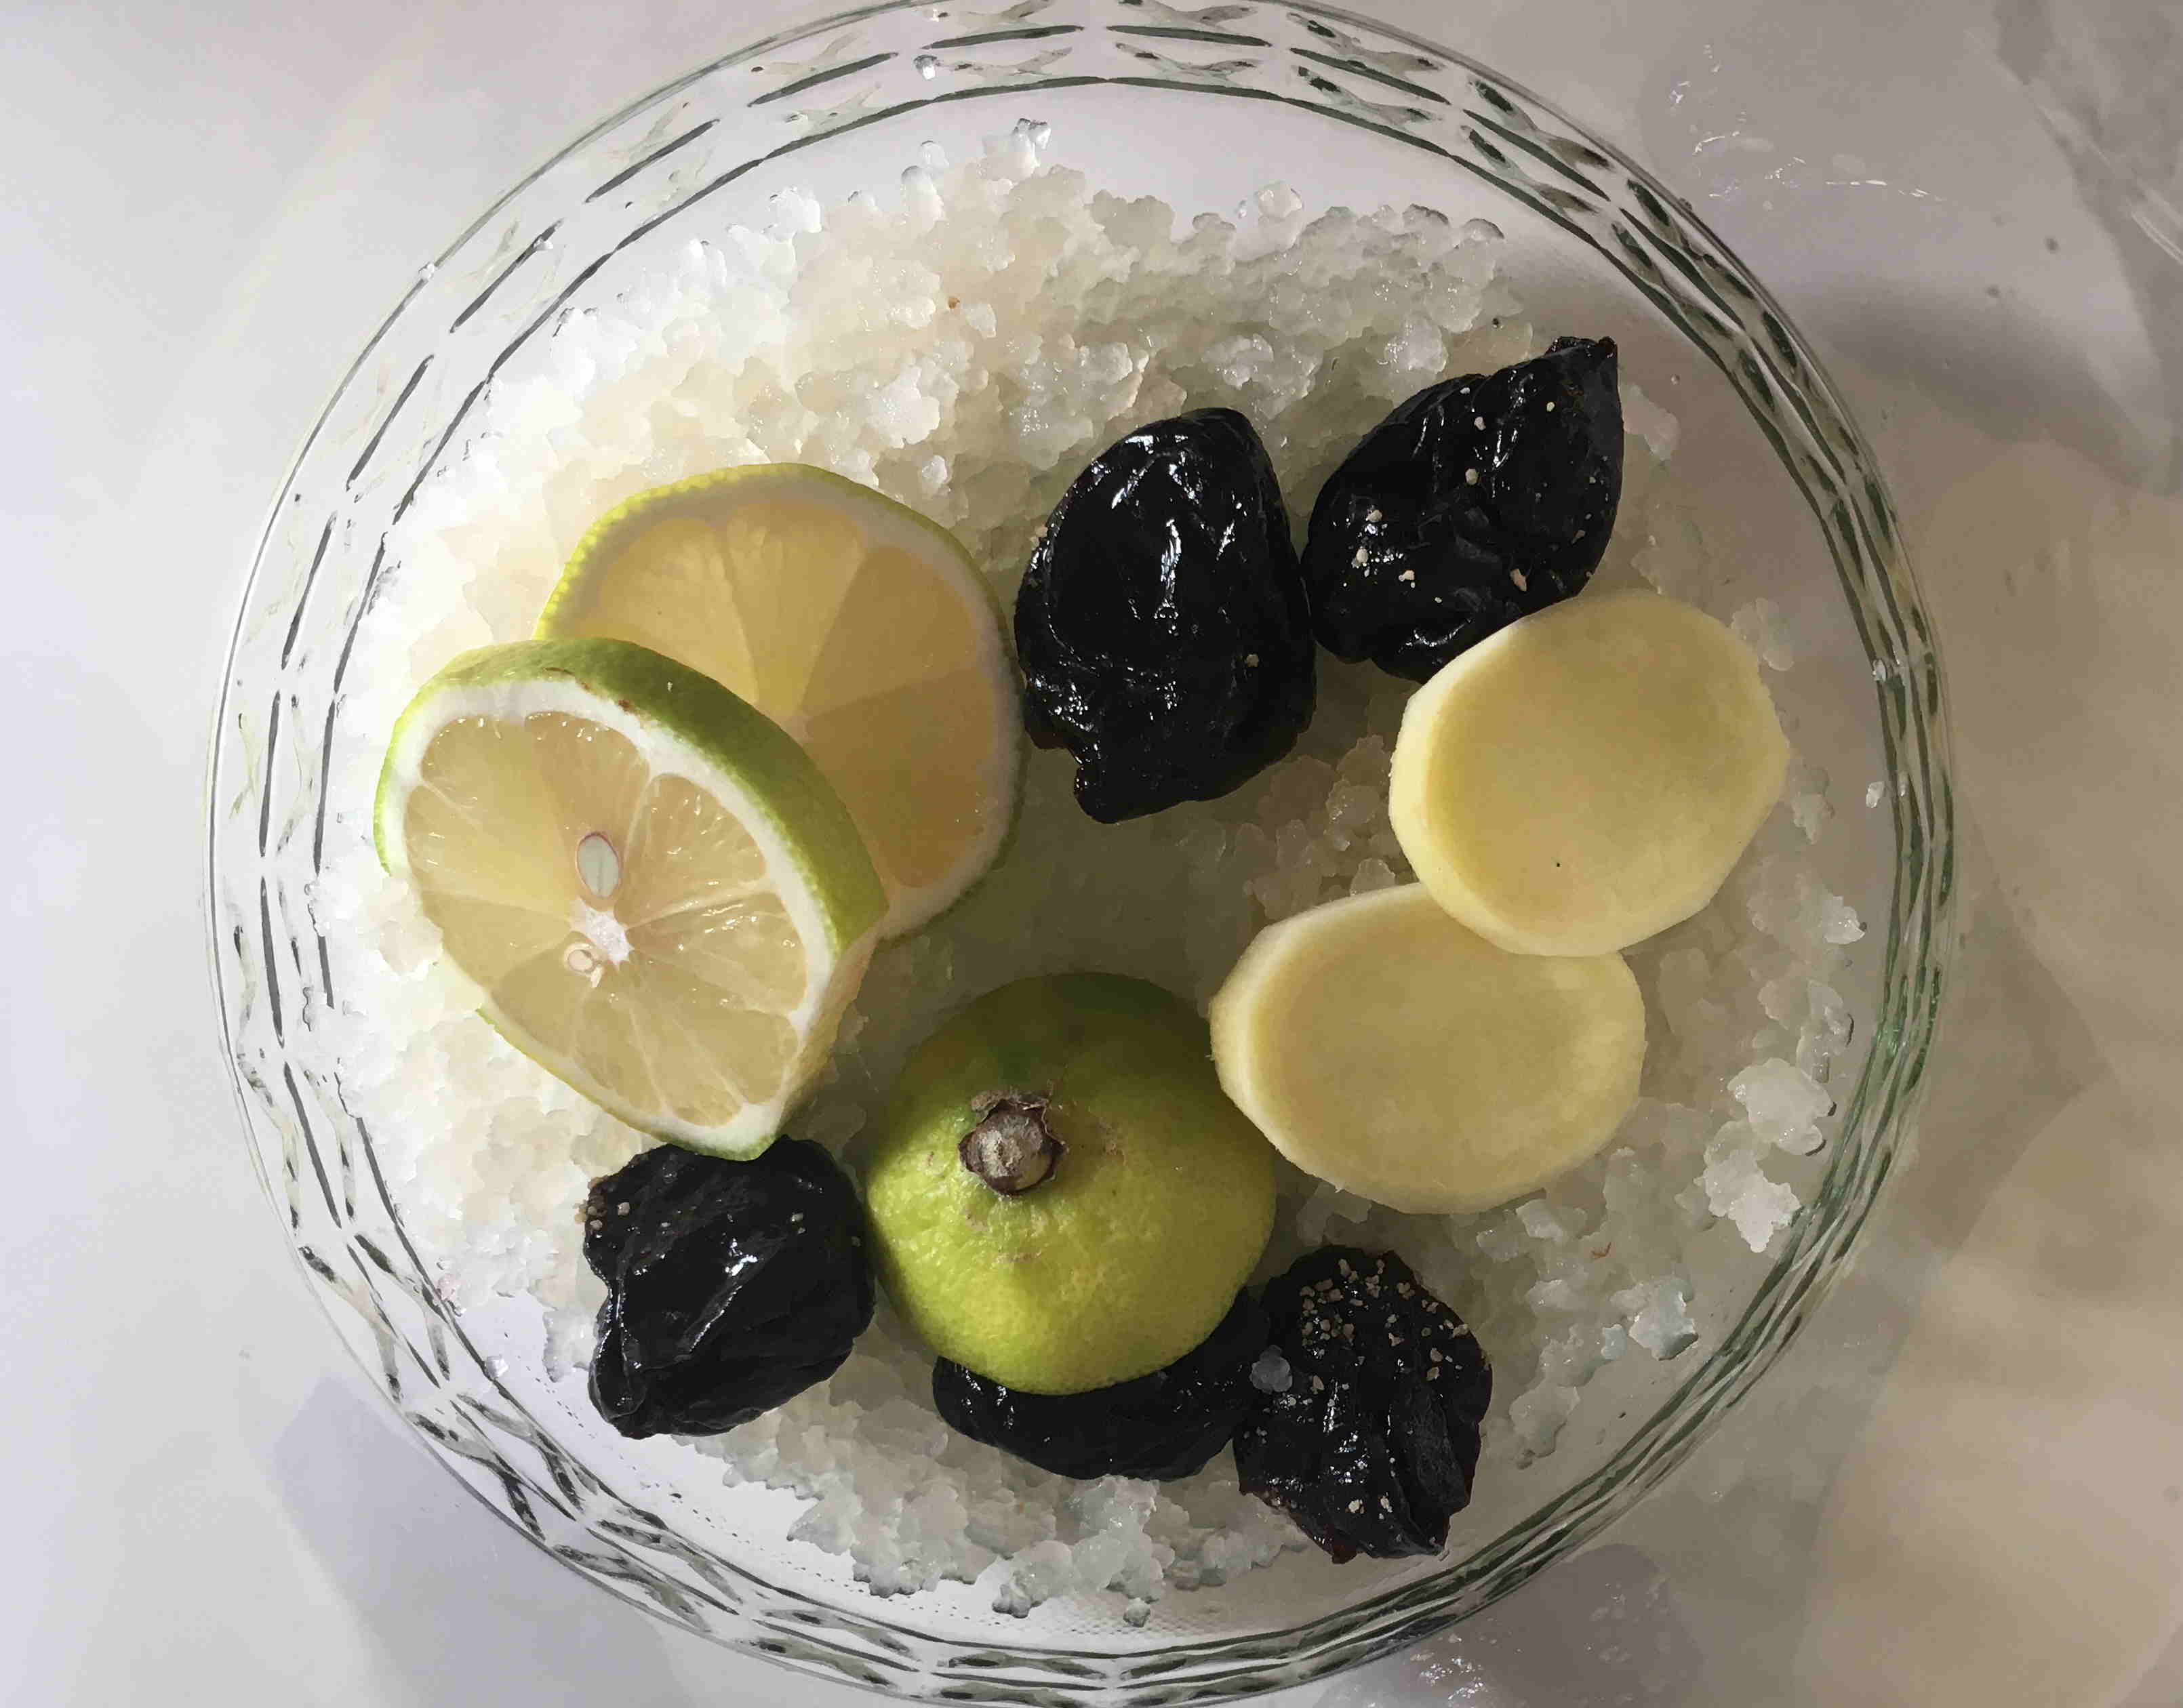
Starting out water kefir with some crystals, dried fruits and lemon

Changing the taste of your lemonade

Water kefir offers a gazillion ways to change the taste, inviting you to experiment with whatever you can think of. Play with the ingredients and/or with the time and temperature of fermentation until you have found your favorite style. E.g. if you prefer it not so sweet, extend the fermentation time, so more of the sugar is being consumed by the yeast. When playing with the recipe, make sure that you always have…

  1. Some form of liquid (water or tea)
  2. Some sort of sugar (honey, brown sugar, maple syrup etc.)
  3. Some sort of dried, non-sulfurized fruits
  4. Some sort of natural acid (lemon, grapefruit, lime …)
  5. Optional: edible flowers, herbs, fruits, aromates (e.g. ginger, cinnamon, vanilla pod…)

Some combinations that I have tried or that I have on my list to try when the season has arrived are

  • Ginger, lemon and thyme
  • Fruit tea and plums
  • Green tea, kaki and lemon
  • Black tea, Lemon, vanilla pod and cinnamon
  • Green tea and yuzu
  • Water, elderflower and lemon
  • Green tea, rhubarb and lemon
  • Water, strawberries, lemon and mint
  • … you see the list is endless

Things worth knowing about water kefir

  1. Water kefir doesn’t like metal, so use glass and plastic utensils when dealing with the grains (strainer, funnel, jars etc.).
  2. The importance of hygiene in the kitchen, especially when dealing with fermentation shouldn’t be new, but the be safe I mention it again
  3. Pausing to make water kefir. If you want to stop making lemonade for a couple of days or are going on vacation, put your water kefir grains and 10% sugar water (100g sugar for 1l water) in an non-lidded glass jar in the fridge. When you want to restart simply rinse the grains and use them according to the basic recipe.

Japan meets Italy: Okara Grissini

I told you here about my mission to make proper Kinugoshi (Japanese silken tofu) at home. By now I can reliably repeat making both – momendofu (firm tofu) as well as Kinugoshi, which is especially wonderful with the heat of the summer that is finally approaching Germany. Kinugoshi is by far my most favorite lunch snack in hot weather. Served chilled with a refreshing ponzu sauce, some grated ginger and dry roasted katsuo bushi or equally wonderful with a sauce that I call ‘liquid umami’ and some wasabi for a little kick.

Okara are packed with fiber, protein and iron

Yesterday was tofu-making day in my kitchen and every time you make tofu you end up with about as much okara. The left over lees. As nothing goes to waste in the Japanese kitchen there are many ways to use up okara, which by the way is packed with fiber, protein and iron.

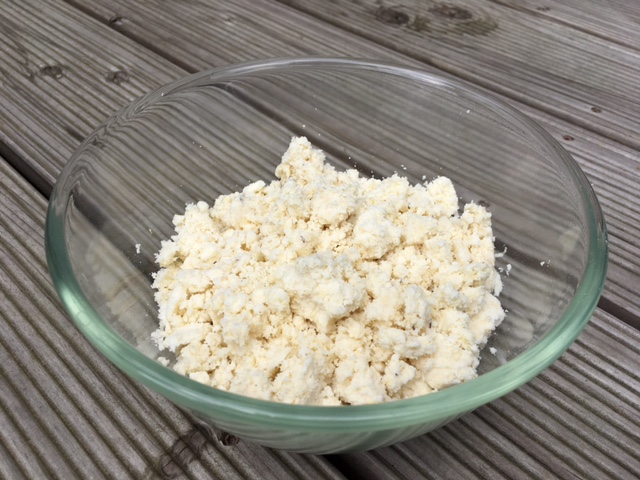
Fresh okara and flour in a bowl

On my Shōjin Ryōri event I used okara to make croquettes – alongside with potatoes, pumpkin and adzuki beans -finished off with some freshly ground sancho pepper and super fine ‘snow’-salt.

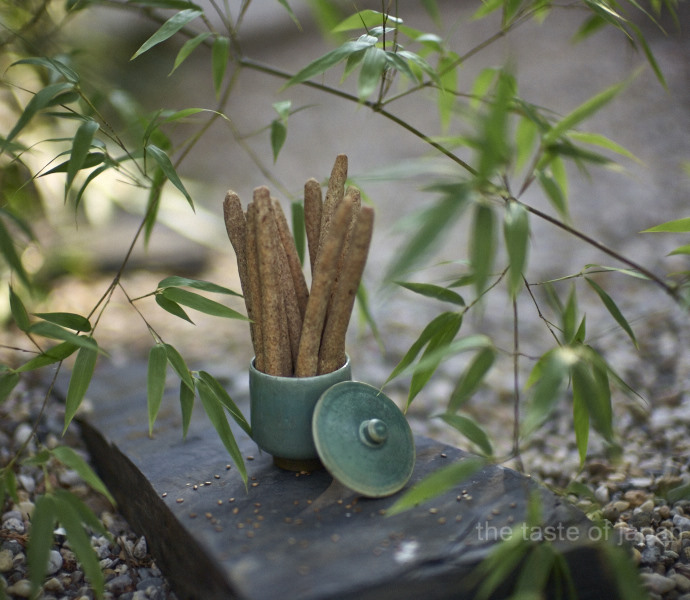
Today though we will get a much-valued visitor that we haven’t seen for quite some time. There will be a lot of talking and sake to catch up and I prepared okara grissini as a nibble to go with the sake (Tskudani make a good nibble as well, so do pickled cucumbers) . Not exactly a Japanese recipe, but highly recommendable. You can make the okara-grissini using eggs as well as a replacing the eggs with flaxseeds. I prefer the vegan version, because the flaxseeds add an interesting component to the grissini.

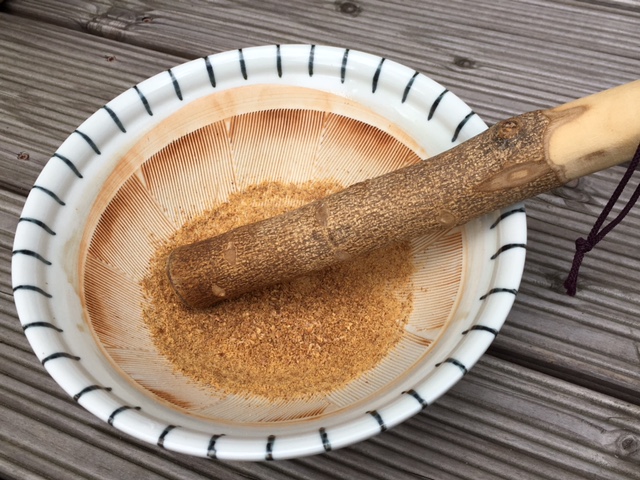
Freshly powdered flaxseeds ground in a suribachi

Recipe for 14 (vegan) Okara-Grissini

Ingredients

200g fresh okara
100g Bread flour
1

1 Tbsp.

3 Tbsp.

Egg or alternatively

Powdered flaxseeds and

Water

¾  tsp. Salt
1 tsp. Baking Powder

Method

Pre-heat the oven to 180° C. If you are preparing the vegan version mix the powdered flaxseeds with the water and let them rest for 10 Min. In the meantime mix the other ingredients in a bowl. Add the flaxseeds once they are done and knead well. The better you knead the better the dough will hold together. Especially important should you decide to use low-gluten flour.

Ready made dough

Portion out about 25g of the dough and roll each of it up to a 20cm grissini. If you use larger amounts of dough or prefer the grissini to be thinner make sure to adjust the baking time accordingly. Put them on a parchment lined baking tray and bake them for 30 Minutes. After they have cooled for a few minutes you can eat them straight away. Ideally consume them the same day to enjoy their crispiness.

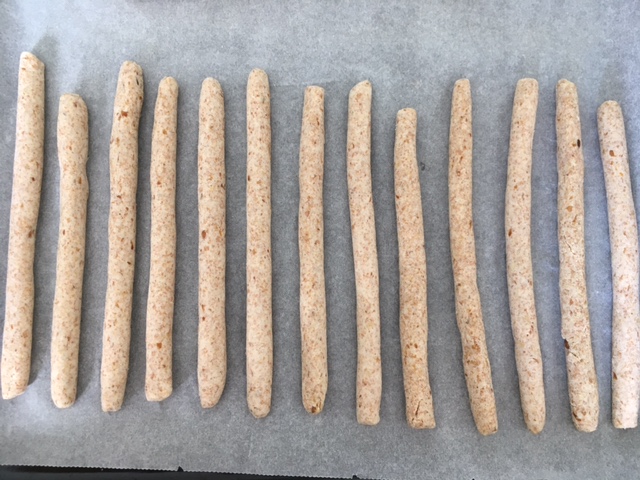
Okara-grissini just before they went in the oven

If you want to add nutrition you may change the flour to whole-grain flour. I also like to make okara-grissini with whole-grain spelt flour, but in this case I need to be a bit more conscientious when kneading the dough and rolling the grissini, as the dough doesn’t hold together as well.


* Okara can be kept up to five days in the fridge or several weeks in the freezer if you do not have the time to use it up right away.

Want more recipes using okra or tofu? Sign up for the newsletter and get them in your inbox.


Liquid Gold: The Heart and Soul of Japanese Cuisine

When in doubt, add a splash of dashi. Dashi is everywhere in Japanese dishes.

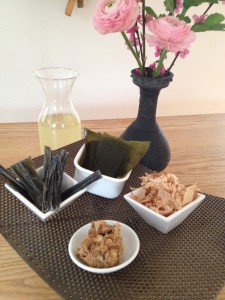
Ingredients before and after making dash
Ingredients before and after making dashi

It is cooking liquid, seasoning as well as base for soups and sauces. Good dashi is magical. It is subtle and delicate but has the power to enhance flavors without overpowering dishes with its own taste. Sometimes just a few drops can make all the difference in the world between a good and a gorgeous dish. Making good dashi is easy and only takes a couple of minutes.

So here is a quick guide how to make Japan’s liquid gold from only two ingredients: Katsuo bushi (bonito flakes) and Kombu (seaweed).

Make Kombu-dashi

In Tokyo with its hard water Hidaka-Kombu is the standard, in the Kansei Region with its soft water it is Ma-Kombu. But if you have not access to different types of kombu, just use the one you can get your hands on.

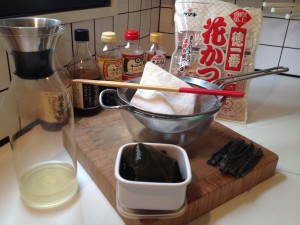
Set-up to make dashi

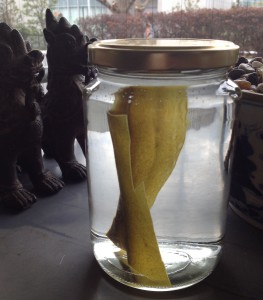
Take a piece of about 10 x 10cm and let it sit for a minimum of 15 Minutes in a glass jar filled with water. I usually use about 750 ml.

DON’T wipe off any of the white powder that might be on your dry kombu. Similar to the sugar that gets to the surface of dried fruits, the natural glutamates of the kombu appear as a white powder on the surface. And the entire purpose of making dashi is to extract them. So wiping them off would diminish all your efforts.

Soaking KombuTo save some (waiting) time during the cooking process, I recommend to do this right when you decide to cook something Japanese and have it sit in your kitchen until you are ready to go. This can even be a couple of hours or over night when you put the jar in the fridge. The result that you will get in your jar is kombu-dashi. Kombu-dashi is frequently used in vegan dishes as a replacement for dashi and has a similar flavor enhancing character.

Make Dashi

Dashi Making 3
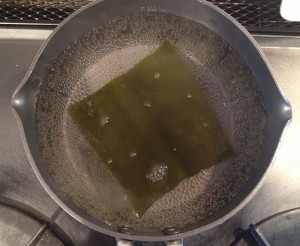
The water has about 85°C when bubbles break at the surface

To make dashi, heat the kombu-dashi with the kombu in it on medium heat until about 85°C. If you want to be exact you can of course use a thermometer, but a close observation of your pot will do the trick as good: Remove your pot from the heat once the bubbles begin to break on the surface. This is about 85°C and the optimal temperature to extract the glutamates but not the (bitter) tannins of the kombu. Now is the time to add a good hand full

Adding katsuo bushi to the kombu-dashi

of katsuo bushi and wait for two or three Minutes before straining them through a fine mesh layered with Sarashi or a kind of fine-woven cloth that you have on hand. Use the dashi right away or let it cool to room temperature before covering it and putting it in the fridge for later use.

That’s it. It is that easy!


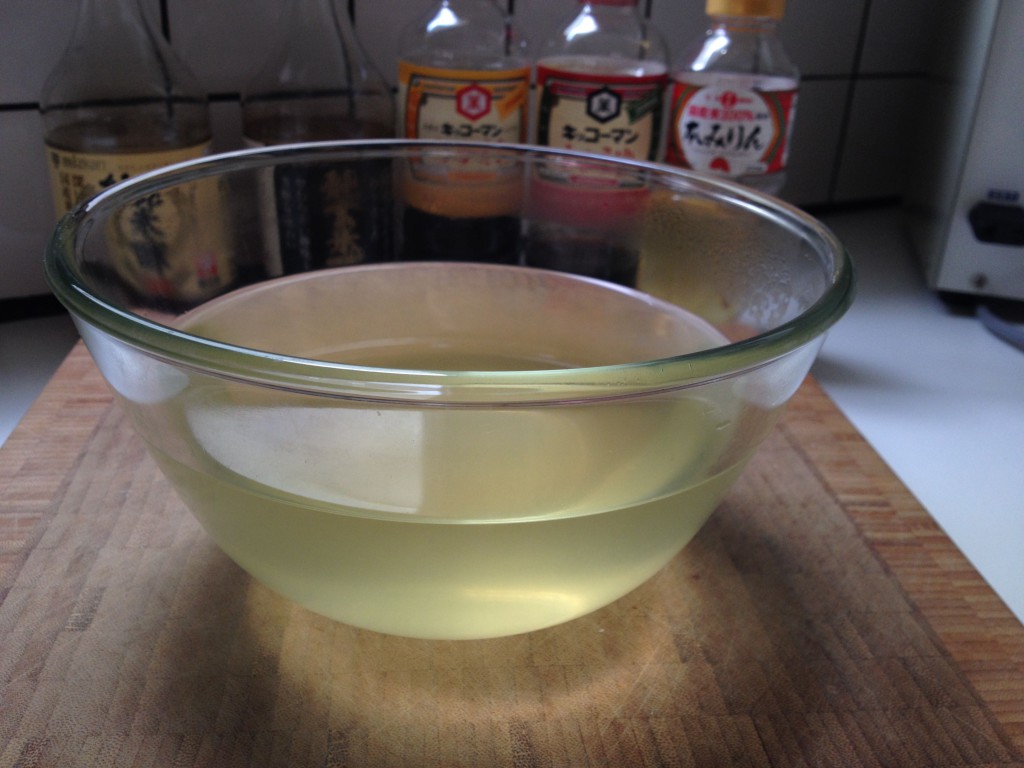
A bowl of golden dashi

Despite all the simplicity there are a few things to consider:

  • Don’t put in more katsuo-bushi or soak them longer. Doing that would extract the fishiness instead of the smokiness.
  • Don’t wash the cloth that you used with soap unless you want your next dashi to taste soapy. Just rinse it right away under very warm water and hang it to dry.
  • Last but not least: There are recipes out there that call for the Katsuo Bushi to sink to the bottom of the pot before straining. That is not a good rule of thumb! The time for the Katsuo Bushi to sink to the bottom depends heavily on their size. Large flakes, that you will often find after just opening a new bag, will sink very slowly. Much longer than the two to three Minutes that you need. Whereas the flakes on the bottom of a bag, that are almost powder, will sink right away to the bottom, which would give them not enough time to release their wonderful flavor.

P.S: As nothing is going to waste in the Japanese kitchen, making dashi is no exception. Save the kombu and use it for quick pickles or tsukdani (simmered in soy sauce with herbs or vegetables) and make tasty furikake from the left over katsuo bushi to sprinkle on rice or to mix in onigiri (