漬物 Tsukemono-Workshop: Fermenting the Japanese Way

I am excited to announce that I have my first cooking workshop coming up next Saturday in Berlin at the Nion Japanese Pop-up Store in Kreuzberg. Participants will learn the basics about Tsukemono, the Japanese way of preserving and fermenting food and will get to start their own nuka-pot, a very traditional way of fermenting that can be kept for years and years.

There is still room for a few more participants, so if you live in Berlin or are in the area and want to dig into fermentation, just drop me a line (d.maas@theatsteofjapan.com). The workshop-fee includes all materials and a subsequent meal according to the Washoku-guidelines, which I will introduce in more detail during our early dinner. Please see below the flyer and more details on the upcoming workshop.

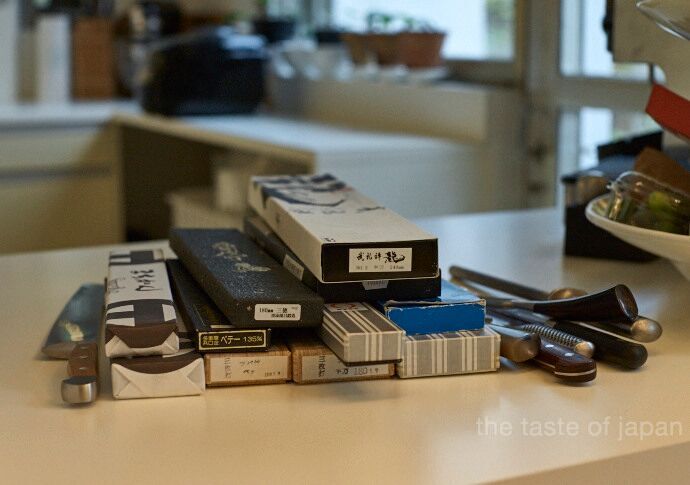
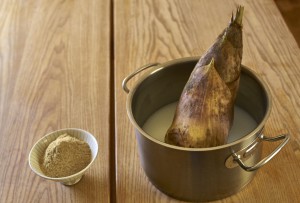
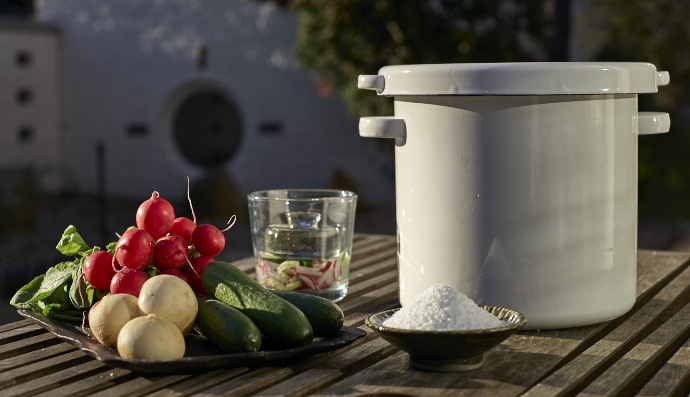
As for the nuka-pot that you should bring: you can easily find something suitable online. With a search for”Gärtopf” you’ll find various offers for glazed ceramic pots (e.g. www.gärtopf.de) or check www.emaille24.de to find an enamel lined pot similar to the one you can see on the picture.
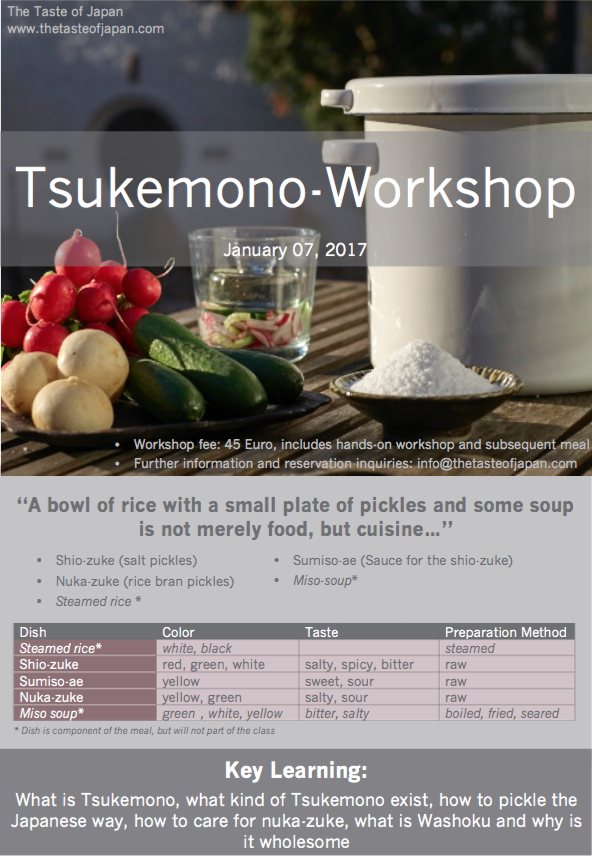
Schnappschuss (2016-12-30 15.10.02)

What is Tsukemono

“a bowl of rice with a small plate of pickles and some soup is not merely food, but cuisine…”

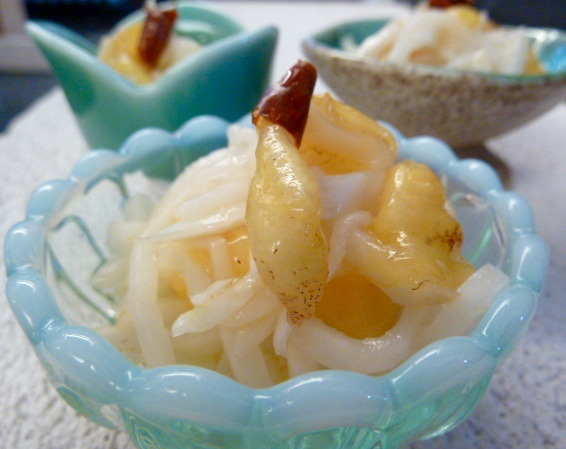
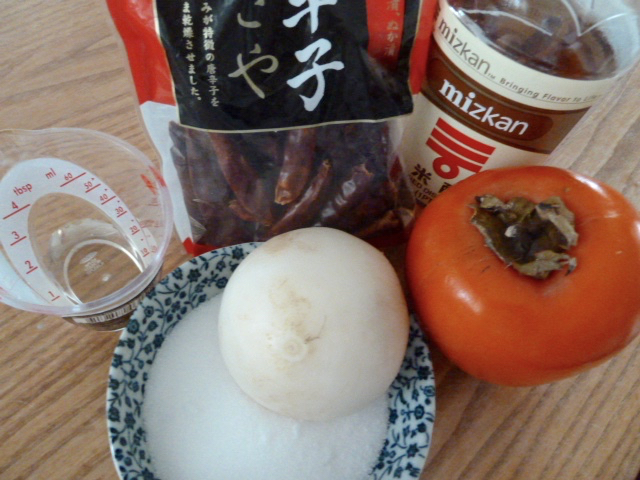
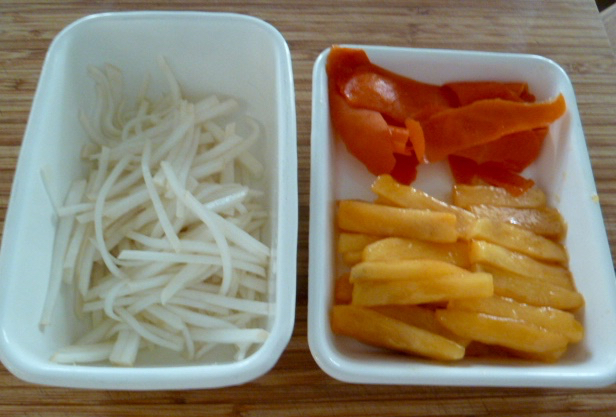
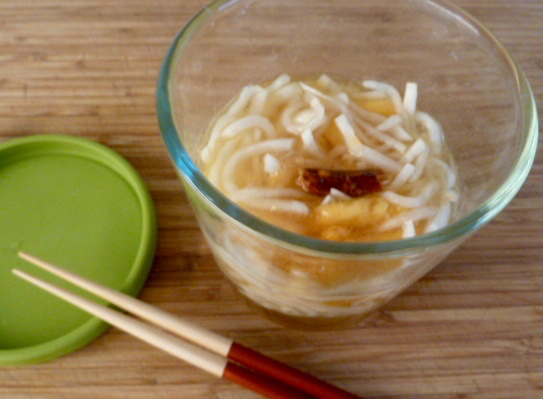
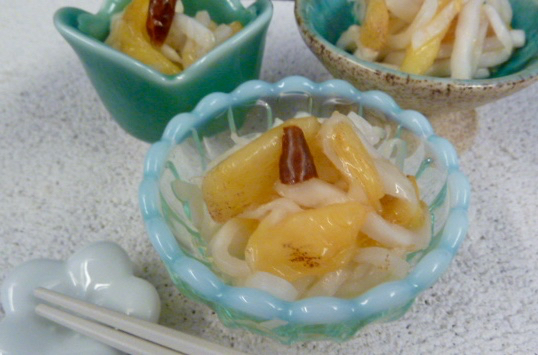
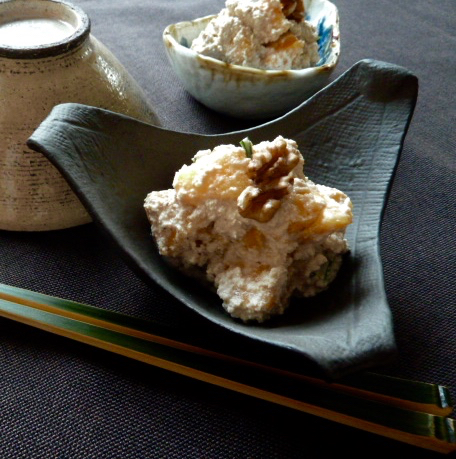
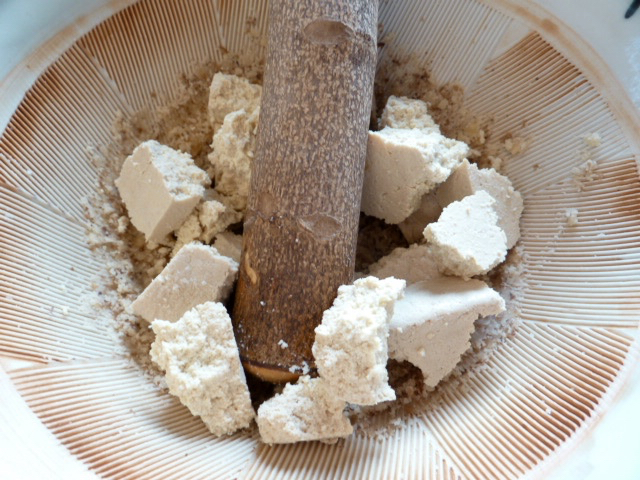
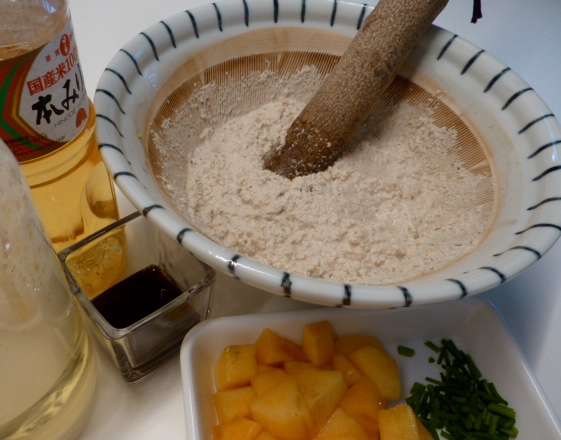
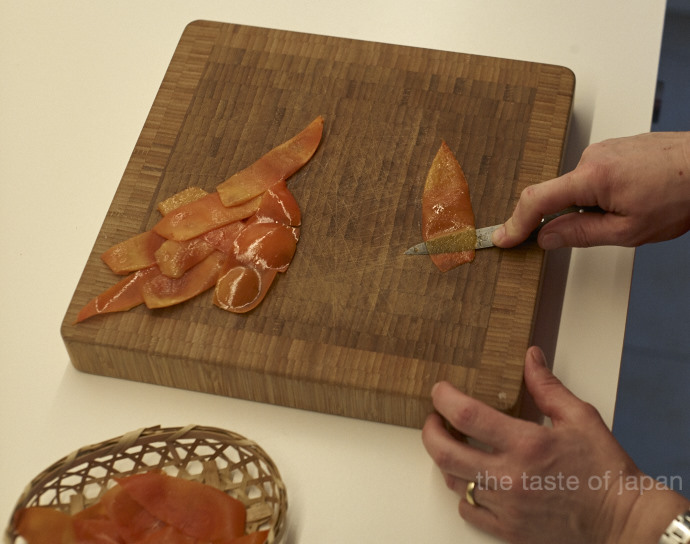
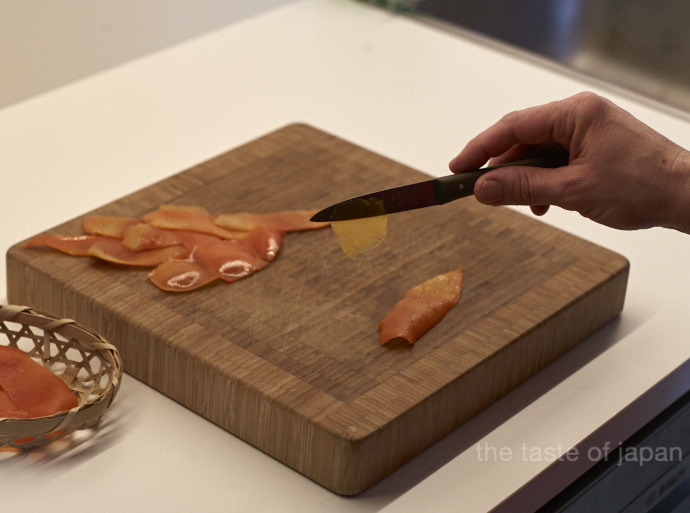
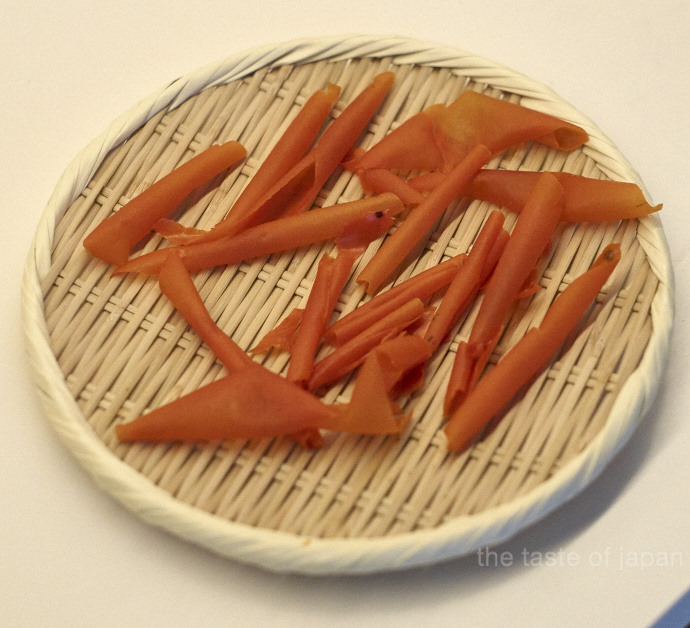
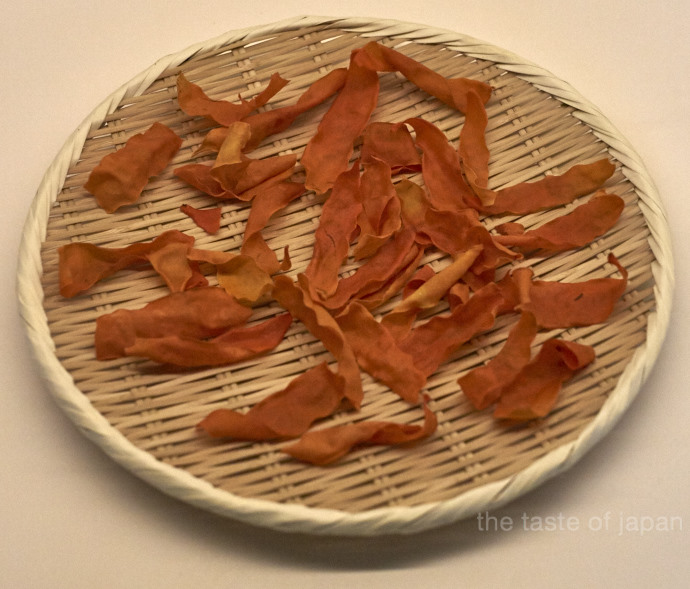
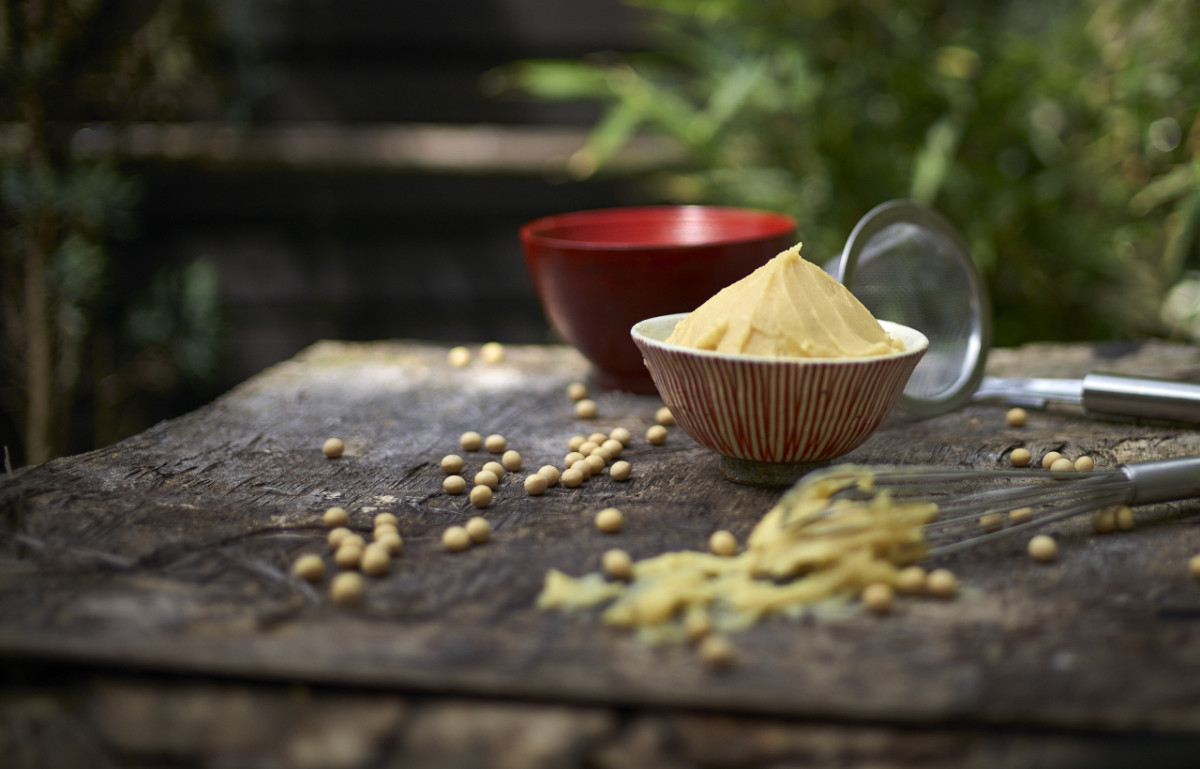
Tsukemono translates to ‘pickled things’. Preserved vegetables that are staple food in the Japanese diet. But Tsukemono is so much more than simple pickling. There are a wide variety of methods that are used for ‘pickling’. Throughout history, the Japanese have found wonderfully delicious innovative ways for transforming and preserving their food.

Do you know what to expect?

In this approx. 2,5-hour workshop you will get basic skills and knowledge regarding the traditional/classical methods in preparing two different kind of Tsukemono. One will be a quick pickle that will be ready for you to taste at the end of the workshop. An easy way of fermenting that offers a myriad of variations for you to try at home. The second type is ‘nuka-zuke’, one of the most traditional Japanese Tsukemono. You will get to start your own ‘nuka-pot’ to take home with you for future fermentation in your own kitchen.

What you need to bring along

  • Knife
  • Cutting Board
  • Container with a lid that holds approx. 4-5 l and 18-20 cm diameter
    • Ideally ceramic (glazed inside) or enamel lined metal (look for a straight edged ‘Gärtopf’-type of container).
    • The container should have been washed and disinfected using boiling water prior to the workshop

Achara-zuke with Turnips and Persimmons

I did order more persimmons. Much more. Twenty kilograms, to be precise. Just about when my youngest daughter, who had been eating one big persimmon per day, decided that from now on ‘mikan’, which are mandarins, are her favorite fruits.

So now I have this big pile of wonderful fruit sitting on my terrace waiting to become something delicious. Actually a quite typical situation when you live with the seasons. Something we hardly know anymore, given the year-round-availability of products. We are used to go into the supermarket and find whatever a specific recipe calls for. If it is not in season it might be a lot more expensive and the quality might not be what we would like it to be, but you can be sure to find everything somewhere. Living with the seasons, however means that fruits and vegetables that are available are of excellent quality and taste. This is the good news. The challenge is, that over the course of a vegetable’s season you get a lot of it on your kitchen counter. The art of (Japanese) cooking is therefore not only focus on the seasons, but also to find many creative ways to transform a specific ingredient. This is nothing that happens over night. It requires a rethinking in the way we want to feed ourselves; it requires a lot of practice, joy to experiment, trial and error and patience. But it is certainly doable. You will not only be rewarded with many new dishes and an extension of your repertoire. Grocery shopping will be much faster and easier. No more frustration because the vegetables your recipe calls for are beyond their prime, or the fruits need a couple of days before they are ready to eat, but you dinner is tonight. No more remorse that the fish you are about to buy doesn’t look so appealing anymore, but it is the only one left, so you take it anyway. Living with the seasons means you take home whatever is fresh and looks appealing, knowing you can turn it into something delicious. Give it a shot, it is worth it.

So back to the 20kg persimmons on my terrace. Kaki no Shira-ae (persimmons in tofu sauce) is certainly something that my family likes to eat throughout the persimmon-season, but as much as they do, they don’t like to eat it every day. So we eat our persimmons grilled, dried, pickled, in salads, made into vinegar and maybe even as a pickle medium, because in Japan this is a way to use up overripe fruits. Regular readers of this blog know by now that I don’t get tired to mention that nothing goes to waste in a traditional Japanese kitchen. And this is – again – a wonderful example of it.

But before I will show you the pictures of my Hochigaki (dried persimmons) next week and explain how I am preparing this Japanese delicacy at home, you find a recipe for Achara-zuke (a quick sweet and sour pickle dish) using persimmons and turnips. Achara-zuke is actually a summer dish and can be prepared with lots of different vegetables, but in using fresh persimmons it becomes a winter dish.

Achara-zuke ingredients

Ingredients: Serves 4

  • 1 persimmon
  • 2 big turnips
  • ½ teaspoon Salt
  • 125 ml Achara-su* (sweet-sour vinegar)
    • 100 ml rice vinegar
    • 60 suigar
    • 25 ml dashi (for a vegan dish use kombu-Dashi)
    • ½ dried Togarashi (Japanese chili), without seeds, alternatively you can use deseeded, fresh chili

Method

Combine all ingredients for the Achara-su except the togarashi (Japanese chili) in a non-reactive pot, stir while heating it over medium heat until the sugar dissolved completely. Remove from the heat, add the togarashi and let cool to room temperature.

Achara-su in the cooling-down phase

In the meantime wash and julienne the turnips. Sprinkle them in a bowl with some salt, gently mix and let them sit for about 15 minutes to draw out the liquid. While this is happening peel and cut the persimmons into fairly thin stripes (save the peels if you are into fermenting).

Julienned turnips and persimmons (with the peels ready for drying)

Rinse and drain the turnips and gently squeeze out any excess water with your hands. They should taste slightly sweet and a bit salty and should be flexible, but still crisp. If they are too salty – rinse, drain and squeeze them again.

Achara-zuke waiting to mature

Mix the turnips with the persimmons and submerge them in Achara-su for about an hour before serving them in small dishes. When plating, I like to add a small piece of togarashi on top to alert people that it is a spicy dish.

Final dish
Final dish

______________________
* Tip: If you like Achara-zuke double or even triple the recipe for Achara-su. It keeps well and if you have it on hand preparing Achara-zuke is a matter of minutes.

Kaki no Shira-ae: Persimmons in tofu sauce

Many aspects are simply wonderful about shira-ae (tofu sauce). The most compelling one is probably that it is delicious. Besides that shira-ae is easy to make. It normally doesn’t require cooking and it calls for less than five ingredients. So all you need to do is quickly whip it up. It is frugal. Perfect to use up that little piece of tofu that is left somewhere in the back of your fridge. And it is like a white T-shirt in your repertoire. Savory and sweet – both work wonderful with this healthy sauce that gets its full-bodied flavor from dashi (stock), the secret ingredient of so much Japanese food.


Suribachi (Japanese mortar) with the main ingredients


You will often find shira-ae paired with blanched greens like spinach or green beans. But the recipe that I will make today is a sweet type, a specialty from the Tohoku, the northernmost region of Japan’s main island Honshu. In Japan it is a typical fall-dish, but as the persimmons in Europe are just perfect right now, it’s now time for me to make it.

Ingredients: Serves 4

  • 1 big or 2 small ripe persimmons (if you want to use the fruit as a serving dish use the smaller Fuyu-type)
  • a couple of fresh leafy greens like mitsuba (Japanese Parsley), alternatively celery leaves – optional

For the shira-ae with nuts

  • 100g tofu
  • 50g walnuts
  • a drop of light (!) soy sauce (usukuchi soy sauce) to taste. Normal soy sauce would stain the dish and spoil the beautiful white color
  • a drop of mirin (sweet rice wine) to taste
  • a drop dashi (stock – use kombu dashi to make it vegan) to taste

Method

If you use really fresh tofu you can use it as it is. If your tofu is a couple days old, you might want to blanch it for a minute in boiling water to hedge you bets with hygiene. Don’t refresh the tofu after blanching it, but let it cool on its own while you roast and grind the nuts.

Ground walnuts
Ground walnuts

Dry roast your nuts over medium heat. When they are aromatic and lightly colored, save a couple to decorate the final dish and transfer the rest to a suribachi (Japanese mortar) or food processor, whichever you prefer to use. Grind them to your preferred size before adding the tofu. I like to notice the nuts in my dish, so I will not grind them very fine.

Add tofu in little pieces

Now rip the tofu in small pieces and add it to your nuts. Grind and mix until the tofu-nut-mixture is smooth and thick. If you use a food processor make sure to only pulse-process the mixture to avoid heating it up. Finally add the seasonings to your liking. Be careful though not to add too much. Shira-ae is purposely only delicately flavored to give each ingredient the opportunity to stand out and be recognized. The final sauce should have the consistency of thick yoghurt and can be kept in the fridge for about two days.

Thick, yoghurt-like shira-ae

For the final dish, peel and cut persimmons into little, bite-size dices (dry the peels, if organically grown, and use them e.g. as fermentation seasoning). You can also cut persimmons just beneath their ‘shoulders’ and use them as a serving dish, but you will need to scoop out more persimmons for serving than to prepare the dish! Cut the stems of the mitsuba and gently mix them with the persimmons and the shira-ae just before serving it. Decorate with some roasted nuts and mitsuba-leaves and/or with the ‘lids’ of the persimmons that you scooped out.

Final dish
Final dish

As said in the beginning, shira-ae is versatile and can be used with many other ingredients. Replace persimmons with apples, pears, grapes or melons after the seasons is over for a creamy sweet indulgence.

Persimmon Peel Prominence

Almost as if they have been painted. The persimmons that just arrived not only look as though they were freshly picked, their taste tells me that they are: sweet, succulent and juicy. Irresistible, especially to my one-year old who just learns to speak. Her vocabulary is rather limited, but “Kaki” (how persimmons are called in Japan as well as Germany) and “more” is something that we hear quite often these days.

In Japan persimmon season starts a little earlier than in Europe, but right now you can get wonderful fruit at the peak of their season – in Japan called shun. Don’t be tempted to buy them in a supermarket, unless you want to be disappointed.

Unboxing persimmon-delivery

In a traditional Japanese kitchen nothing goes to waste and as such I not only use the flesh of persimmons. I also have a wonderful use for the peels, as long as they are organically grown. So on my mission to find persimmons that grown accordingly I came across Quiero Naranjas. Quiero Naranjas is a company, run by two brothers, that is specialized in growing tropical fruits in Valencia, Spain. They pick, very carefully wrap and ship the fruit right after your order so that you get to enjoy them when their flavors peak. The persimmons are usually ready for ordering in November, but you can witness their growth on the website all year long.

Removing the flesh from the peels

In my kitchen dried persimmons peels are a seasoning for my nuka-pot, which I use to prepare nuka-zuke. Nuka-zuke is a very traditional type of tsukemono –the Japanese way of pickling and fermenting, which will be featured here soon. To dry them I carefully shave the flesh completely off the (washed) peels before I spread them out to air-dry them above the heater for about 24 to 48 hours.

Removing the flesh from the peels
Persimmon peels ready to be dried

So until today, I have not managed to get anything more than the peels. The rest vanished completely in my youngest daughter’s little tummy. So I will order more. For my little one but also because there are so many wonderful dishes that I have been waiting to prepare for almost a year now and which I would like to introduce. So stay tuned for some ideas how to prepare persimmons the Japanese way.

Dried persimmon peels

Arrived !?

For some reason packing seems to be faster than unpacking. By now it has been a few weeks since we came to Berlin, but the most prominent decoration of our home remain to be towers of boxes, waiting in each corner to be unpacked, reminding me every day that there is still quite some work ahead of me.

We like Japan too much for any euphoric feeling to ever occur about us moving back to Berlin, but at the same time there is some excitement in starting all over, that keeps you going – until that one day when you wake up with a ‘hangover’. Actually you carry that feeling around for quite a bit, but then one day you wake up realizing that you are in the middle of a reverse-culture-shock. At least the adults in our house, for whom life in Berlin is something familiar. Our girls however are struggling a bit more. They are German, look like Germans and speak German, but were raised in Japan. Now they need to find their way in a world where no one understands that to them everything is new and strange. Despite the fact that Berlin is tiny compared to Tokyo, life is somehow faster, is duller, is tougher. More elbows, less service, more egoism, less honesty, more swearing, less respect, more dirt, less kindness…

Even though it has been quite on “The Taste of Japan” lately, even though I was busy finding a new home, a new school, new kindergarden and nursery while unpacking and sorting hundreds of boxes to get this family back to a state of normality, it was not quite in my kitchen. Behind the scenes I captured every kitchen on the way and worked on pickling Ume Boshi (pickled plums) and pickled apricots. I also made Yukari (dried and pulverized red Shiso leaves from the plum pickling) and Ume Su (plum vinegar), documented the making of rice and sushi-rice, took my nuka-pot (pot for rice bran fermentation) on a journey around the word and further developed my love for sake where I will be able to share some exciting news soon. I am excited about this restart to cover culinary Japan for you.

And to answer the question if we have arrived. Generally speaking – yes we have. We will also feel at home once we have replaced the boxes by pictures to decorate our walls. But we also know that there will always be some sort of yearning to go back to the land of the rising sun, no matter where life will take us.

Moving

So far I have moved more than ten times. Small ones with just a few boxes and a van to the other side of town as well as big ones to the other side of the world – and back. But even though I have quite a record, I am far from having a routine. Which currently puts me in the middle of our own moving chaos.

Every morning I find myself mucking out old stuff and packing box after box. Here and there dwelling on rising memories, finding long lost items and trying not to go mad over a workload that seems greater than Mount Fuji. Given that all this is happening while my youngest one is taking her morning nap I don’t have a lot of time to linger about. Once she is awake my productivity is going down to zero and shortly afterwards I have to pick up the other two from school, being forced to swap moving chaos with the playground.

As you can imagine, writing is something that I don’t quite manage to squeeze into this schedule. So I apologize for only posting irregularly until we have arrived in our new life and until I can start again to cover culinary Japan on a weekly basis.

Parent and Child

Actually it’s kind of wrong to post the recipe for this dish now – in the high of spring. It would be similar to decorating your house in orange an black on Christmas, but on the other hand it was the first thing that came up to my mind for this week’s post, given that this week we had both mother’s day and father’s day in Germany and children’s day (Kodomo no Hi) in Japan.

I am talking about Harako-Meshi (rice mixed with salmon and salmon caviar). It is a signature dish in Miyagi prefecture, which is in the Tohoku region of Japan’s main island Honshu. It is a typical autumn dish – that’s why it is odd to post it this time of year, but the meaning of this dish is ‘parent and child’, so – for me – it fits perfectly into this week.

Now here is the recipe and you can decide for yourself if you want to be impatient and cook it right away or if you prefer to enjoy it during its season.

Ingredients for approx. 4 persons as a main dish:

2 cups Japanese rice
ca. 2 cups of dashi (alternatively you can use water)
400 g fresh salmon (filleted without skin)
50 ml Saké
15 ml light-colored soy sauce
40 ml regular soy sauce
200g sushi-grade salmon caviar

Method:

I prepare my Harako-Meshi Takikomi Gohan-style. So I simmer the salmon quickly in a seasoned broth, keeping salmon and broth separate afterwards. I then use that salmon-flavored broth to cook my rice. After my rice is done, I add the salmon back again on top of my rice in the rice cooker or pot and keep it warm for a couple of minutes before topping it with a generous scoop of salmon caviar. Here are the details:

  1. Wash the rice well until the water runs clear and save the togi-jiru (read here for my favorite ideas for using it) for a later use. If you have the time let the rice dry after washing for 15-30 min. to prevent it from breaking. For the same reason barely cover the rice afterwards with fresh water and let it soak for another 30 min. Strain the soaking water and set the rice aside until the cooking liquid that you are about to prepare has cooled to room temperature.
  2. Cut the salmon sogi-giri-style* (cutting into slanted pieces) and marinate it in the sake and light-colored soy sauce for min. 10 minutes (or up to an hour in the fridge).
  3. Harako Meshi 1Mix dashi and regular soy sauce and bring to a boil. Reduce the heat and add the salmon with its marinade for ca. 30 seconds until the surface has changed color. Strain and reserve both, salmon and cooking liquid separately.
  4. When the coking liquid has cooled to room temperature (important!) you can start cooking the rice. Put the rice in the rice cooker or the pot and add 2 1/3 cups of coking liquid to it. If you don’t have enough cooking liquid, fill up with dashi or water and start the cooking process.
  5. Harako Meshi 3When the rice is done (keep warm phase on the rice cooker or the self steam phase when cooking rice on the stove) open the lid, put the salmon on top of the rice and quickly put the lid back on. Leave the salmon on the rice between 15 and 20 minutes.
  6. When serving the rice set a few pretty salmon pieces away for decoration. Using a shamoji (rice paddle) mix the rice with folding and cutting motions toss the while flaking the remaining salmon at the same time. If you are nice, make sure to mix in the crust at the bottom (okogé). In our home it would be considered the best part of the dish, if there wasn’t the salmon caviar, which my oldest daughter refers to as ‘funny stuff’, because she likes the mouth feel when she bites on it.
  7. Garnish with a generous scoop of bright red salmon caviar to reunite the ‘parent and the child’.

Harako Meshi 4

Enjoy, happy mother’s day and happy belated father’s day!

_____________________

*Sogi-giri-style cutting:

Holding the knife diagonally, almost parallel to the cutting board making almost horizontal cuts. This method results in more surface area of the ingredient so that it cooks faster, soaks up flavor more quickly and/or has a greater surface for a sauce to cling on.

Go shiki, Go mi, Go ho

Preparing the pictures for my next post, I cooked Harako-Meshi (Rice with salmon and salmon caviar) and integrated it into last night’s dinner. I know I still owe you an article on Washoku (Japan’s traditional food culture), what it is and how to put it into practice. Take this article as a first glimpse. Cooking according to Washoku guidelines means preparing ‘go shiki, go mi, go ho‘ – meals. Which describes meals that contain five colors, five flavors and have used five ways of preparation.
Coming back to our dinner last night. Here is what you see on the picture and how this complies to the Washoku guidelines:
Go shiki Go mi Go ho
 The Dishes (starting from the lower left)
  1. Harako-Meshi (knowing that it is actually a fall dish)
  2.  Pickles
    • Tskudani with enoki mushrooms (soy glazed kombu and mushrooms)
    • sweet and sour pink pickled myoga
    • nuke zuké (cucumbers pickled in rice bran)
  3. Chawan Mushi with green asparagus and enoki mushrooms (egg custard)
  4. Togarashi (chilli) infused quick pickles with su miso (vinegar-miso-sauce)
  5. Miso soup with snow peas, enoki mushrooms, bright colored yakifu (baked wheat gluten) and slices of fried tofu
  6. Thin, grilled slices of pork with fresh herbs (shiso, myoga, spring onions, young ginger), drizzled with a wasabi infused soy sauce
Five Colors:
  1. yellow: Chawan Mushi, su miso
  2. red: pink pickled myoga, fresh myoga, salmon and salmon caviar
  3. green: fresh herbs, cucumbers, aspargus, quick pickles, wasabi, snow peas
  4. white: enoki mushrooms, daikon (Japanese Radish) in the quick pickles
  5. black: Tskudani
Five Flavors:
  1. sweet: miso, pink pickled myoga
  2. salty: all dishes
  3. sour: nuka zuké, pink pickled myoga, su miso
  4. bitter: fresh herbs
  5. spicy: wasabi infused soy sauce, quick pickles with togarashi
Five Methods of Preparation:
  1. steamed: Chawan Mushi, rice
  2. simmered: miso soup, Tskudani, salmon
  3. seared: pork
  4. fried: fried tofu
  5. raw: quick pickles, nuke zuké, salmon caviar

Why Wash Rice?

Nothing goes to waste in the Japanese Kitchen. Nothing. I have internalized this appreciation that I have learned from Andoh sensei years ago in our very first encounter. After a while it becomes not only a daily practice and routine, it also becomes kind of a hobby to find out how much (more) you can (re)use from an ingredient.

I usually consume white rice. It cooks and behaves widely different than brown rice – and – admittedly because I like it better. Though I do make sure to get my nutrients back in eating nuka zuké (Japanese vegetables pickled in rice bran) and adding different grains to my rice. Which leads me directly to using food – in this case rice – fully. Nuka (rice bran) is a byproduct when milling rice. It is being used as a pickle medium for vegetables and also in the cooking liquid (nuka-jiru) for e.g. fresh bamboo shoots to neutralize the natural occurring toxic and bitter components.

Some of the nuka remains on the rice and this is why you should wash your rice thoroughly before cooking or it will not cook as well. Coming back to my favorite Japanese kitchen mantra ‘Nothing is going to waste in the Japanese kitchen’: Save that water (togi-jiru) and dedicate it to a useful purpose. Need ideas? Here are my top five ways to reuse the water from washing rice

Togi-jiru for CookingCooking: The rice oils and the starch in togi-jiru neutralize bitter enzymes that allow the sugars in the vegetable to be more noticeable. Use togi-jiru instead of water to cook e.g. daikon, sweet corn or burdock for a palate-pleasing sweetness.

Togi-juru as creamBeauty: Carefully pour off the water after the sediment has formed on the bottom. Feel it. It is soft and silky.  A wonderful cream. I use it for my hands, as it doesn’t leave a greasy film behind and it doesn’t have artificial ingredients that I wouldn’t want to get on my food. Even better: it removes unwanted odors like fish or garlic.

Togi-jiru for plantsPlants: Frugal cooks also save the second and third wash to water their plants. The containing nutrients really perk them up.


Togi-jiru for pottery


Kitchen Hygiene: Togi-jiru is  effective in removing odors from your pots and pans (e.g. after cooking fish). It can also be used in cleaning the tiny contours and crevices of earthenware pots, rice bowls and teacups.


Togi-juru for cleaningCleaning: So far I have always used my togi-jiru up for cooking, as a cream or for my pots and pans. But apparently it is said to be also great for giving a nice shine to your floors, shower, bathtub, or toilet. So if you happen to have any left over togi-jiru put it in a spray bottle when wiping down your house.

You can keep togi-jiru for up to five days in the fridge an. This way you can collect the water from washing your rice for several days. The sediment at the bottom of your jar will thicken with each addition, when you pour off the water above it to make room for the new washing water.

Miso Madness: Marinated Fish

Today was one of those days. An overflowing to do list and whatever I started seemed not to end precisely where I wanted. Adding to the distraction that comes with a not-so-much-sleeping-anymore-baby my oldest one joined in, as she couldn’t go to school either. Those days would normally be destined for some take out food or home delivery. Normally. If take out wouldn’t take so much time to pick up, given that I have to take the entire kids-gang with me. If delivery services would make tasty food. If I would find a delivery service that has food for every taste and age. If I would find a delivery service that serves the food either super fast or in a reliable time frame to arm me for the witching hour when my girls transform to kidzillas. But so far I haven’t found one. And on those days I cannot afford to stir a pot on the stove while consoling one, two or three girls at the same time close to tears myself. On those days I need a kitchen lifesaver. Quick and easy soul food. Comforting, healthy and satisfying.

One of my all time favorites in this situation is succulent Saikyo Yaki (Miso-marinated grilled fish), served with a steaming bowl of freshly cooked rice and a savory miso soup. As usual, I have some fish in its marinade in my fridge waiting patiently for those days to come. Now all I need is a tiny bit of preparation to bring out the smiles again with a yummy dinner on the table in about 10 minutes elapsed time. How does that sound?

So whenever you have a moment during the day wash the rice, put it in the rice cooker and keep it warm until you need it. At the same time soak some kombu (kelp) in water and make dashi (basic stock) within a couple of minutes (see recipe here), putting you in the pole position to whip up a miso soup while the fish, that you just need to take out of the marinade, is broiling. That’s it.

Certainly no remedy against the witching hour, but a way to make your life easier in the heat of the moment. Admittedly, I almost always have some salmon marinated in miso sitting in my fridge. Just to be prepared. Also because it simply tastes wonderful and keeps for about five days in the marinade.  And even if I don’t have one of those days, I don’t mind a yummy and healthy dinner that only takes minutes to get on the table.

Saikyo Yaki

Ingredients

  • 4 pieces á 100g  Fish (e.g. Salmon, (Spanish) Makarel, Cod)
  • some saké (optional
  • Sarashi or cheesecloth, big enough to wrap the fish
  • Non-reactive vessel that holds the fish in a snug fit layer

Marinade  

  • 450-500g saikyo miso (sweet, light miso)
  • 80 ml Mirin
  • Zest of one yuzu, lemon or orange

Method

Rinse the fish under cold water and pat it dry. If you want to hedge your bets rinse the fish with sake and pat it dry. Mix the ingredients for the marinade and put half of it in a non-reactive vessel. Place the sarashi or cheesecloth (in a double layer) on top of the miso in the vessel, press down slightly and add the fish (snug fit). Enclose the fish with the remaining piece of sarashi/cheesecloth, put the second half of the marinade on top of it and close the lid or cover with a sheet of plastic wrap. Let the fish marinate at room temperature for a minimum of six hours or in the fridge for up to five days. The longer the fish marinates the firmer it will get and the more intense the salty-sweet miso flavor will become.

To cook the fish scrape off the marinade on top of the sarashi/cheesecloth (save the marinade for another use in a glass jar) and remove the fish from the container. Place the fish skin side down on a piece of aluminum foil and grill it for about three or four minutes (the skin will bubble and char a bit). Turn and grill for another 2-3 minutes. If you use a broiler start with the skin side up (to protect the fish against the heat). If you have neither use a pan and sear the fish slowly (skin side down first) on medium heat, being careful not to let it scorch. Remove the fish from the heat when being slightly crusty and golden on the outside and still juicy and succulent on the inside and serve it right away or at room temperature.

Stay tuned for more kitchen lifesafers and more Miso Madness recipes. Sign up for the newsletter and you will get them directly to your inbox.