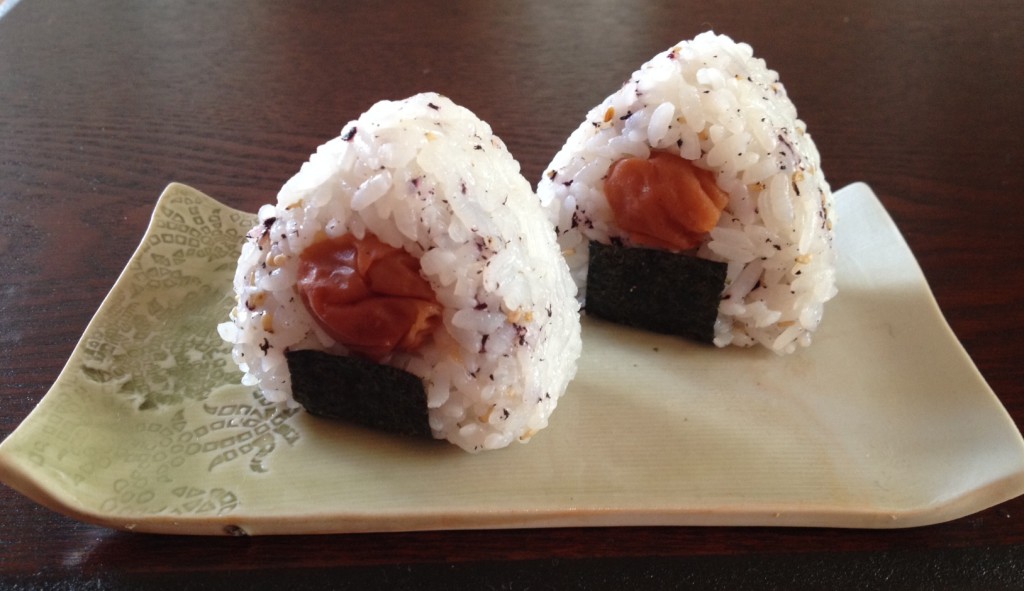
Their taste is new to most people in the West. Mouth-puckering sour, though pleasant, their saltiness is pronounced but acceptable and make a perfect match for many dishes. At our home umeboshi are often added to onigiri. Those hand pressed rice balls that for some miracle reason taste best if they are made by the hands of one who loves you.
Yukari Onigiri with umé boshi
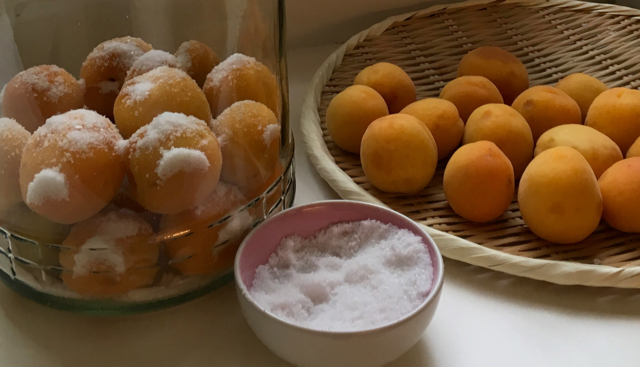
These days it is easy to buy ready made umeboshi at Asian and organic supermarkets, but nothing beats them being home made. Getting umé, botanically prunus mume or Japanese apricots in Germany is not easy. Until our umé tree yields fruit I am using local apricots instead.
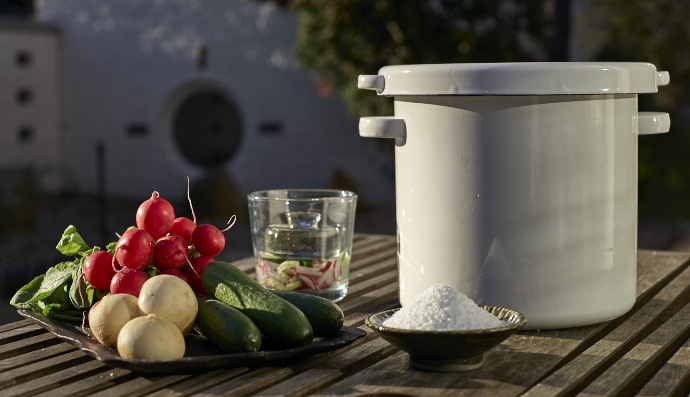
Layer soaked, unbruised apricots with salt in a non-reactive container.
How umeboshi are made
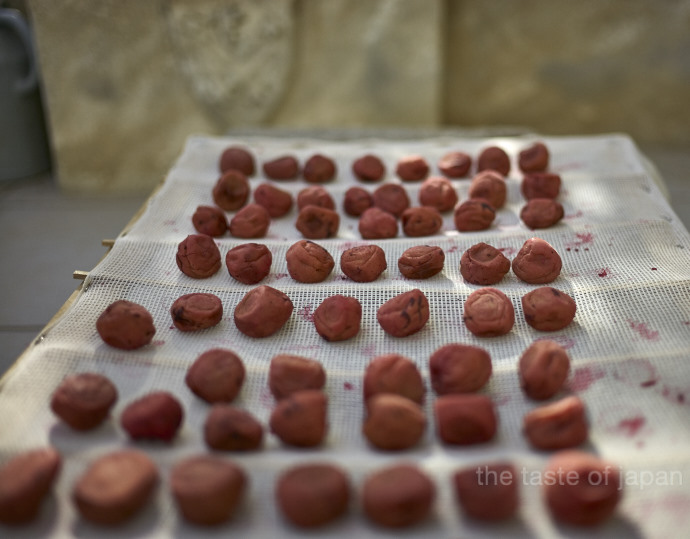
Traditionally umeboshi are being pickled – often but not always with red shiso leaves – in Japan’s rainy season and are left to ferment in their own brine for about six weeks, before they get laid out and dry in the summer sun for three days.
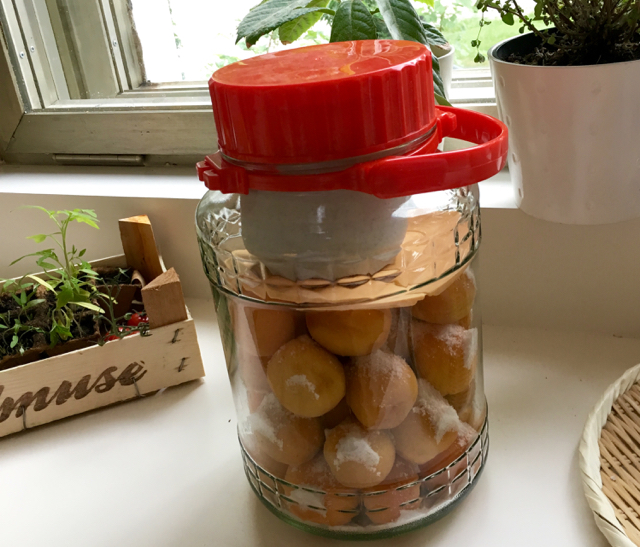
Add weight and patience for the brine to develop and rise and fermentation to happen
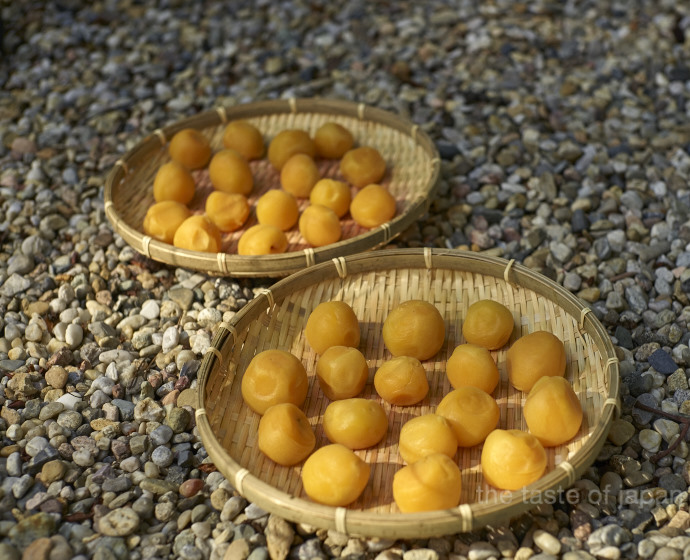
What seems easy in Japan with its hot summers is a challenge in Germany. Even more so this year, where summer took a long time coming. But finally the weather forecast predicted a couple of hot days. Perfect timing for my ‘umeboshi’, that will get their finishing touch of summer sun.
‘Umeboshi’ laid out to dry in the summer sun
Want to make umeboshi at home?
This years umeboshi pickling season is over, but if you want to join me in making umeboshi next time, sign up for the newsletter and I will guide you through it step-by-step.
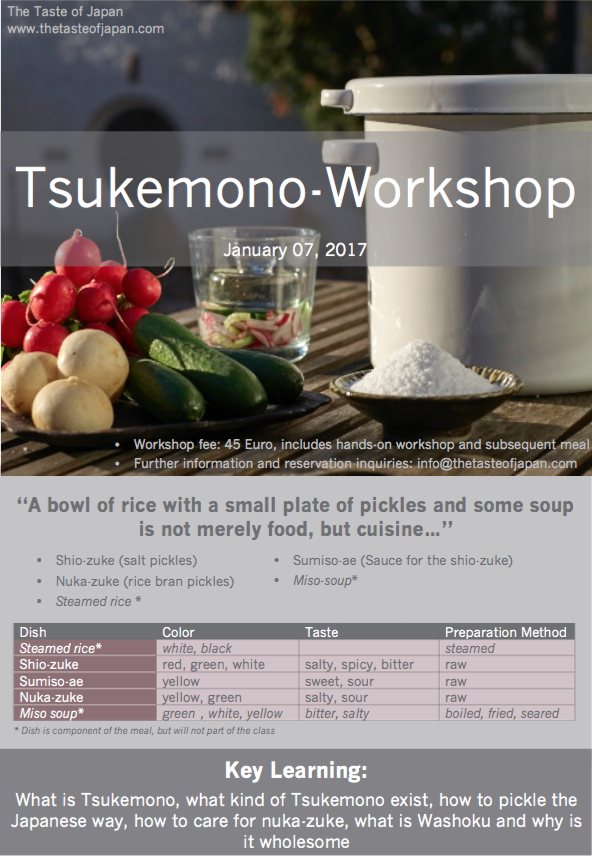
“A bowl of rice with a small plate of pickles and some soup is not merely food, but cuisine…”
(Michael Ashkenazi, The Essence of Japanese Cuisine)
I remember a sunny early autumn day in Tokyo. The heat and cruel humidity of the summer was finally over when a bunch of people literally from around the world gathered in Elizabeth’s kitchen around a big dark brown earth ware pot, waiting for its secret to be unveiled. ‘Take a whiff ‘ was the invitation to carefully look and smell into the pot.
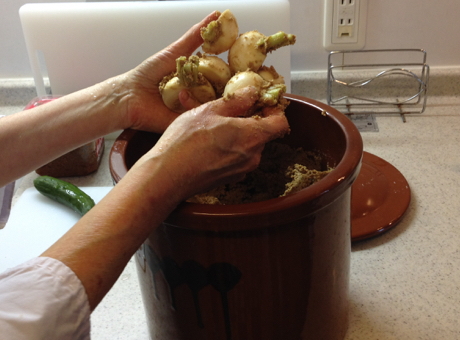
Turnips coming out of the nukadoko
But no hands, because hygiene is extremely important in keeping a nuka-pickle-pot healthy. Nukadoko (pickling bed) can be passed down for generations and as such the one in front of me was easily some 150+ years old. Given that nukadoko is a living organism that requires constant monitoring and attention, it doesn’t come on a surprise that Elizabeth is very cautious.
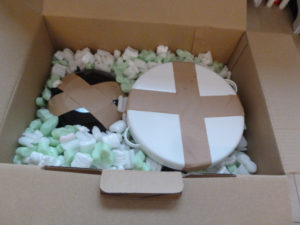
My nuka-pots carefully packed for the long trip down south
The only one allowed to touch Elizabeth’s nuka pot besides her is her neighbor that takes care of it whenever she is out of town for a long time. Sounds irritating in the beginning, but after having to throw out nuka-pickle-pots that had gone bad three times, I find myself being as careful and restrictive. I even take my nuka-pickle pot with me on vacation or weekend-trips. Is that absolutely necessary? No. There are ways to maintain your nuka-pickle-pot even though you are not around, but as I have Elizabeth’s 150+ years in mine , I am not going to take chances.
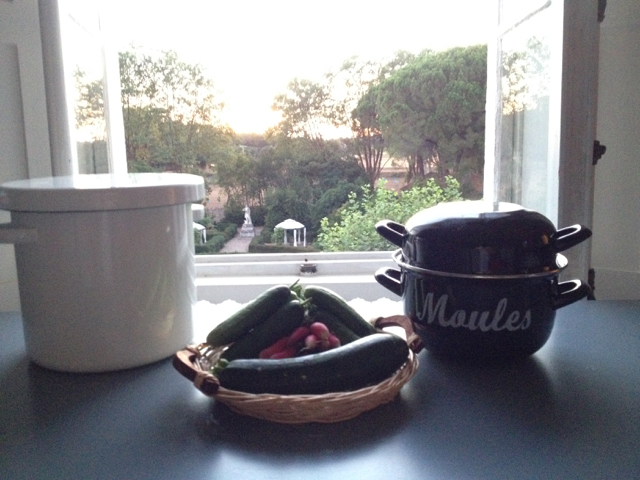
Making nuka zuke in my holiday home kitchen in Southern France last year
Nuka, Nukadoko and Nuka zuké: What’s the difference?
But before I go on, let me explain a few terms here, so that you don’t get confused:
Nuka is the Japanese term for rice bran. In Japan, nothing goes to waste and as such, the nuka that is left after polishing rice (e.g. for table rice, sake making etc.) is used as a pickling medium.
Nuka mixed with water salt and aromatics becomes the pickling medium, called nukadoko.
The nukadoko is usually kept in a (non-reactive) container, a ‘nuka-pickle-pot’ or nuka-pot and
the generic term for vegetables, pickled in nukadoko is nuka zuké.
Nuka zuké ferments vegetables in a couple of hours
Nuka zuké is fairly easy and fast compared to other fermented products, but it needs to be mixed by hand to aerate the nukadoko. Yes, everyday! It only takes a few seconds, but you should be willing to commit to this before you start you own nuka-pot at home. Your reward? Cucumbers turned into crisp, savory pickles over night and tart red radishes get enchanted into exhilarant crudités in a couple of hours.
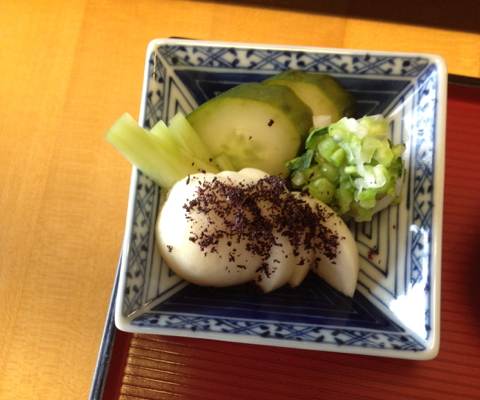
Nuka zuké: Cucumbers and turnips topped with yukari and shio zuké on the side
Nukodoko thrives off the bacteria that live on your hands and the vegetable’s skin. They also influence the taste as well as the aromatics that you can put in. So each nukadoko has its unique taste that will constantly change. Generally spoken an aged nukadoko will be more round and smooth than a young one, similar to wine, that’s why nukadoko can be passed down the generations.
Nuka zuké contains brown rice nutrients
Nukadoko is made from nuka – rice bran. The vitamin rich outer layers of rice – undoubtedly nutritious and healthy – would create off flavors in sake and are often unwanted for table rice. So one way to get back some of those nutrients that have been milled away is pickling vegetables in nukadoko. Nowadays it is fairly easy to source nuka either in Asian markets or online (e.g. here or here), but you could also substitute nuka with wheat bran. Wheat bran is lighter and more fluffy. When using wheat bran instead of nuka you should use a little more water and make sure that your pack down your ‘wheat bran-doko’ tightly on your vegetables to ensure contact with the bacteria.
Become a tsukémono addict
Ever since that one sunny autumn day in Tokyo when I smelled and tasted nuka zuké for the first time, I am enamored with it. But while a taste of vegetables pickled in nuka can prise the gates to Tsukémono heaven ajar, making it yourself will fling them open and convert you to the delights of preserving the Japanese way.
For those that are interested to learn how to start a nuka-pot and to handle it properly, how to influence its taste and troubleshooting-strategies to avoid it going bad, subscribe to the newsletter to get the information on the next nuka zuké-workshop delivered directly to your inbox.
Today’s recipe is a fast one. And easy. Another example of mottainai – in this case using left over kombu from making dashi. Full-flavored pickled cucumber with an addictive hint of sweetness, illustrating once more that Japanese cuisine per se is neither complicated nor that it needs many ingredients.
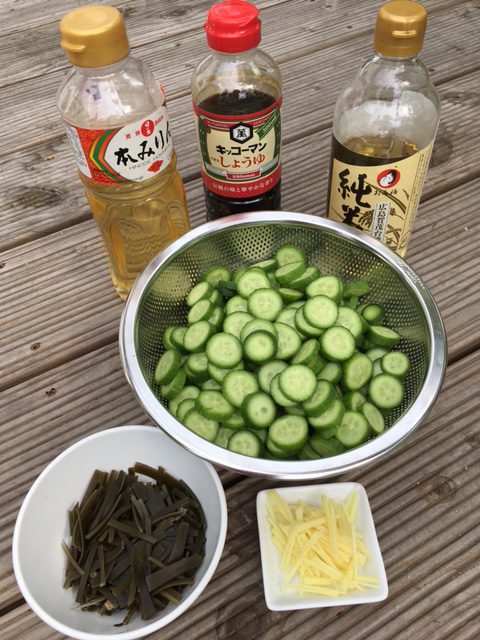
Tsukemono ingredients: Mirin, soy sauce, rice vinegar, cucumbers cut into 0,5cm rounds, threads of kombu and ginger
The recipe calls for cucumbers that do not have a lot of core, so Lebanese cucumbers are not what you are looking for. Japanese cucumbers are perfect, of course, but even if you don’t have access to real Japanese cucumbers you should be able to find mini-cucumbers in your grocery store, that usually have a better flesh-core ratio.
Recipe for one jar Cucumber-Tsukemono
500g Cucumbers
2,5 cm Ginger (peeled)
3-4 pcs. Kombu, left over from making dashi (in threads a small hand full)
180 ml Soy Sauce
120 ml Mirin (sweet sake)
60 ml Rice Vinegar
Method
How to make Tsukemono: Put cucumbers into the cooking liquid
Wash the cucumbers and cut them into 0,5cm rounds. Take the ginger and the kombu and cut them into fine threads. Combine soy sauce, mirin and vinegar in a pot and bring to a boil. Add the cucumbers, ginger and kombu and reboil for a minute. Take the pot off the heat source and let cool (about one hour).
How to make Tsukemono: Strain the cooking liquid before reheating it if you prefer the vegetables to be less crunchy
If you like your pickles to be less crunchy, repeat the process after the pickles have cooled down. In order to do so, strain the liquid and bring to a boil once more. Add the cucumbers, ginger and kombu and reboil for another minute before leaving it to cool again.
Fill pickles with the liquid into a clean glass jar and store in the refrigerator
I know that I promised pictures of my Hoshigaki (dried persimmons) and a description how to make this Japanese treat at home. I am continuously documenting the progression of the drying process, but have not yet managed to write up the corresponding article. Sorry for that, I have to put you off for a bit more until I am ready to post this piece.
More exercise is the no.1 New Year’s resolution of German women, with a healthy diet and loosing weight being second and third. Well, I am not going to help you with exercising, but at least I can contribute the other two. Even a pretty yummy contribution: Kakisu (persimmon vinegar).
In Korea persimmon vinegar is rumored to be the secret weapon to loose weight easily. Busy (working) women drink a few glasses persimmon vinegar dilluted in water per day and some of them swear that nothing ever worked as good and easy in loosing weight.
Having three kids, a normal household (as much as a household can ever be normal with there little ones being intensely busy counteracting any attempt of tiding up), a garden and a job, I have neither time to exercise not to eat a lot. I wouldn’t consider myself skinny, but loosing weight has not yet appeared on my priority list. Maybe when I have more time (wonderful excuse – this way I will get around it for a looong time).
In my house making Kakisu always had culinary reasons. A fruity, yummy vinegar that I like to add to fresh and light summer dishes. My current vinegar is happily fermenting its way and should be ready in spring, just about when all the magazines start to promote the ultimate bikini-workout for the upcoming beach season. As I have it sitting around, why not test the loosing weight effect of Kakisu? I will keep you updated how it goes (without pictures :-).
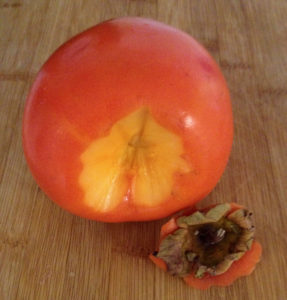
Remove calyx before adding it to the pot
Kakisu is embarrassingly simple to make. If you want to join me in my loosing-weight experiment or if you are curious about making persimmon-vinegar yourself, start your pot, before the season is over.
Ingredients for one pot
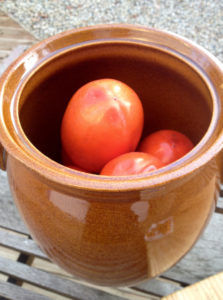
4-6 kg unwashed persimmons (various kinds are as ok as various degree of ripeness)
1 big fermentation pot (non-reactive) without a lid
1 piece of clean cotton, big enough to cover the pot
1 string, long enough to wind around the pot twice
Method
Do not wash the persimmons. The yeast on the skins is what you nee to get the fermentation process going.
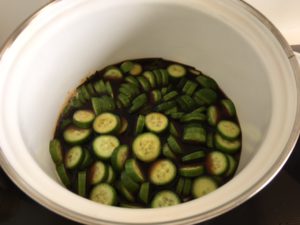
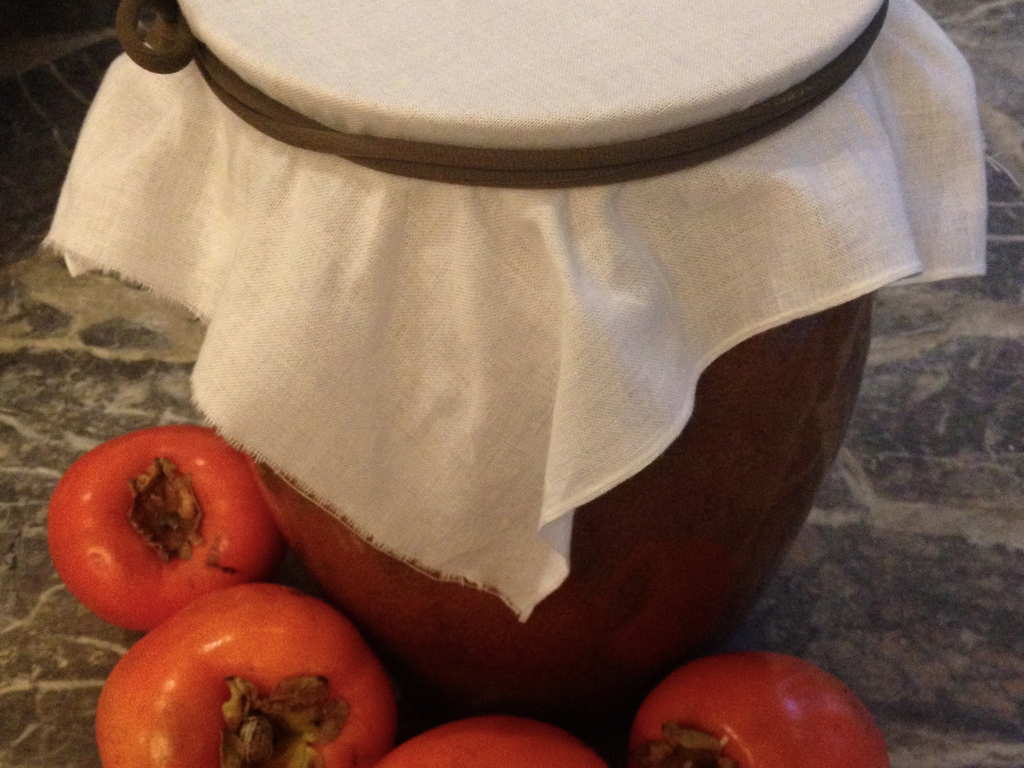
Remove the calyx and stuff as many persimmons as you can cut side down in your pot (I like to put the ripe or overripe ones on the bottom to get the liquid production going fast). Put a clean cloth on top of the pot and tie it down with the string. That’s basically it.
Simple start: put persimmons in a pot, cover and wait.
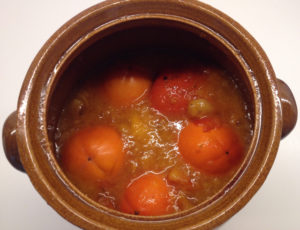
From now on you should mix and squish the persimmons every two days. The first one or two times it is more of a rearranging from top to bottom than mixing. The first two or three times I usually add more persimmons, as the increasing degree of persimmon mash creates room for more persimmons to be added to the mix.
Fermenting persimmons after four days
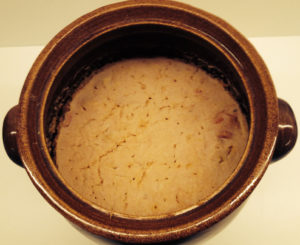
After about a week you should have a puree that is happily fermenting it way, forming a fruity and foamy persimmon-mash. Keep mixing every other day for another three to four weeks. Don’t forget to taste it once in a while. After about a month the persimmon-mash should start to get vinegary overtones. This is your sign to stop mixing. Let it rest to form a ‘mother’ on the surface, mature and mellow for the next three months.
Fermenting persimmons after two weeks
Don’t forget to taste it periodically. Once it has mellow fruity vinegar taste it is time to strain it through a piece of sarashi (Japanese fabric that today is often used in Japanese cooking), a double-layered cheese cloth or a similar cloth). Plan a couple of days for this process; because of the amount of mash, extracting the vinegar will take some time.
And of course there is another use for the persimmon-puree that is left behind in your cloth, so don’t throw it out! Store it in a lidded container in your fridge and use it to pickle daikon or turnips in it. You might also want to store a bit of it in a separate little jar as a condiment. It can be an alternative to ume boshi (Japanese pickled plums) puree. As such to a simple dish as or shio-zuke (salt pickles) as a fruity kick or spread it as a sauce on roulade and add a shiso leaf (Japanese leafy spice) before you roll it up and fry it.
I am excited to announce that I have my first cooking workshop coming up next Saturday in Berlin at the Nion Japanese Pop-up Store in Kreuzberg. Participants will learn the basics about Tsukemono, the Japanese way of preserving and fermenting food and will get to start their own nuka-pot, a very traditional way of fermenting that can be kept for years and years.
There is still room for a few more participants, so if you live in Berlin or are in the area and want to dig into fermentation, just drop me a line (d.maas@theatsteofjapan.com). The workshop-fee includes all materials and a subsequent meal according to the Washoku-guidelines, which I will introduce in more detail during our early dinner. Please see below the flyer and more details on the upcoming workshop.
As for the nuka-pot that you should bring: you can easily find something suitable online. With a search for”Gärtopf” you’ll find various offers for glazed ceramic pots (e.g. www.gärtopf.de) or check www.emaille24.de to find an enamel lined pot similar to the one you can see on the picture.
What is Tsukemono
“a bowl of rice with a small plate of pickles and some soup is not merely food, but cuisine…”
Tsukemono translates to ‘pickled things’. Preserved vegetables that are staple food in the Japanese diet. But Tsukemono is so much more than simple pickling. There are a wide variety of methods that are used for ‘pickling’. Throughout history, the Japanese have found wonderfully delicious innovative ways for transforming and preserving their food.
Do you know what to expect?
In this approx. 2,5-hour workshop you will get basic skills and knowledge regarding the traditional/classical methods in preparing two different kind of Tsukemono. One will be a quick pickle that will be ready for you to taste at the end of the workshop. An easy way of fermenting that offers a myriad of variations for you to try at home. The second type is ‘nuka-zuke’, one of the most traditional Japanese Tsukemono. You will get to start your own ‘nuka-pot’ to take home with you for future fermentation in your own kitchen.
What you need to bring along
Knife
Cutting Board
Container with a lid that holds approx. 4-5 l and 18-20 cm diameter
Ideally ceramic (glazed inside) or enamel lined metal (look for a straight edged ‘Gärtopf’-type of container).
The container should have been washed and disinfected using boiling water prior to the workshop
I did order more persimmons. Much more. Twenty kilograms, to be precise. Just about when my youngest daughter, who had been eating one big persimmon per day, decided that from now on ‘mikan’, which are mandarins, are her favorite fruits.
So now I have this big pile of wonderful fruit sitting on my terrace waiting to become something delicious. Actually a quite typical situation when you live with the seasons. Something we hardly know anymore, given the year-round-availability of products. We are used to go into the supermarket and find whatever a specific recipe calls for. If it is not in season it might be a lot more expensive and the quality might not be what we would like it to be, but you can be sure to find everything somewhere. Living with the seasons, however means that fruits and vegetables that are available are of excellent quality and taste. This is the good news. The challenge is, that over the course of a vegetable’s season you get a lot of it on your kitchen counter. The art of (Japanese) cooking is therefore not only focus on the seasons, but also to find many creative ways to transform a specific ingredient. This is nothing that happens over night. It requires a rethinking in the way we want to feed ourselves; it requires a lot of practice, joy to experiment, trial and error and patience. But it is certainly doable. You will not only be rewarded with many new dishes and an extension of your repertoire. Grocery shopping will be much faster and easier. No more frustration because the vegetables your recipe calls for are beyond their prime, or the fruits need a couple of days before they are ready to eat, but you dinner is tonight. No more remorse that the fish you are about to buy doesn’t look so appealing anymore, but it is the only one left, so you take it anyway. Living with the seasons means you take home whatever is fresh and looks appealing, knowing you can turn it into something delicious. Give it a shot, it is worth it.
So back to the 20kg persimmons on my terrace. Kaki no Shira-ae (persimmons in tofu sauce) is certainly something that my family likes to eat throughout the persimmon-season, but as much as they do, they don’t like to eat it every day. So we eat our persimmons grilled, dried, pickled, in salads, made into vinegar and maybe even as a pickle medium, because in Japan this is a way to use up overripe fruits. Regular readers of this blog know by now that I don’t get tired to mention that nothing goes to waste in a traditional Japanese kitchen. And this is – again – a wonderful example of it.
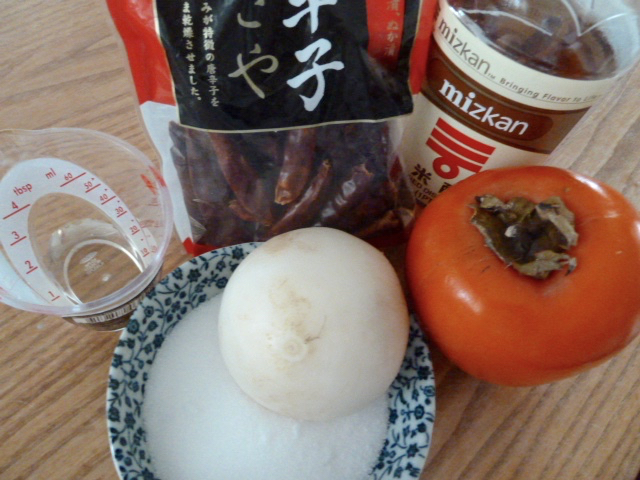
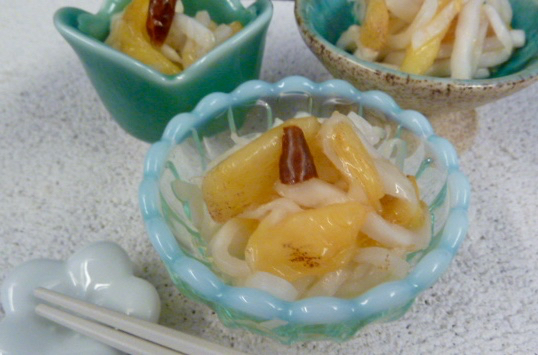
But before I will show you the pictures of my Hochigaki (dried persimmons) next week and explain how I am preparing this Japanese delicacy at home, you find a recipe for Achara-zuke (a quick sweet and sour pickle dish) using persimmons and turnips. Achara-zuke is actually a summer dish and can be prepared with lots of different vegetables, but in using fresh persimmons it becomes a winter dish.
½ dried Togarashi (Japanese chili), without seeds, alternatively you can use deseeded, fresh chili
Method
Combine all ingredients for the Achara-su except the togarashi (Japanese chili) in a non-reactive pot, stir while heating it over medium heat until the sugar dissolved completely. Remove from the heat, add the togarashi and let cool to room temperature.
Achara-su in the cooling-down phase
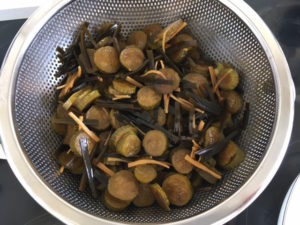
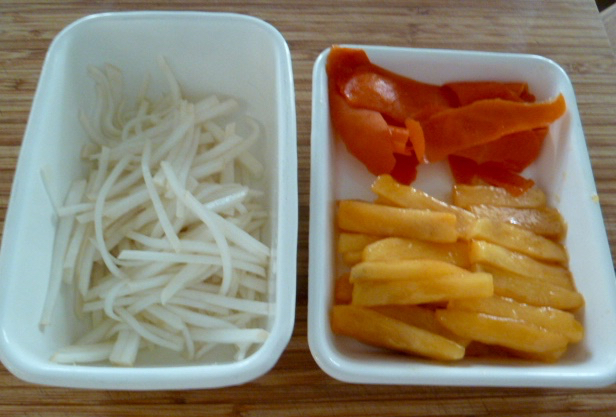
In the meantime wash and julienne the turnips. Sprinkle them in a bowl with some salt, gently mix and let them sit for about 15 minutes to draw out the liquid. While this is happening peel and cut the persimmons into fairly thin stripes (save the peels if you are into fermenting).
Rinse and drain the turnips and gently squeeze out any excess water with your hands. They should taste slightly sweet and a bit salty and should be flexible, but still crisp. If they are too salty – rinse, drain and squeeze them again.
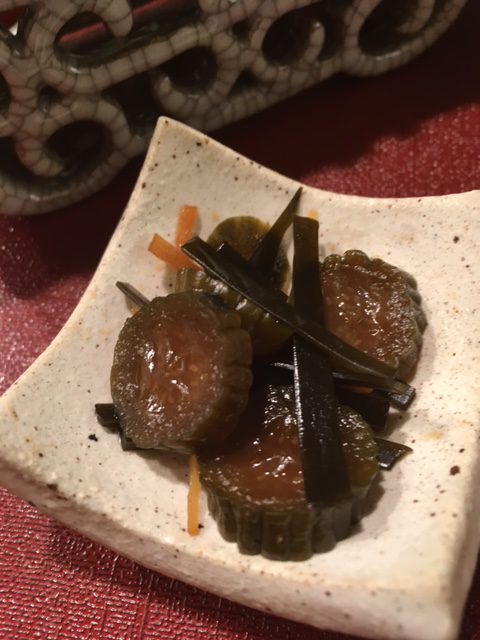
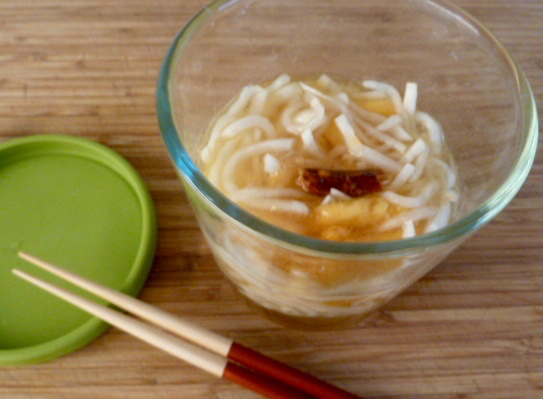
Achara-zuke waiting to mature
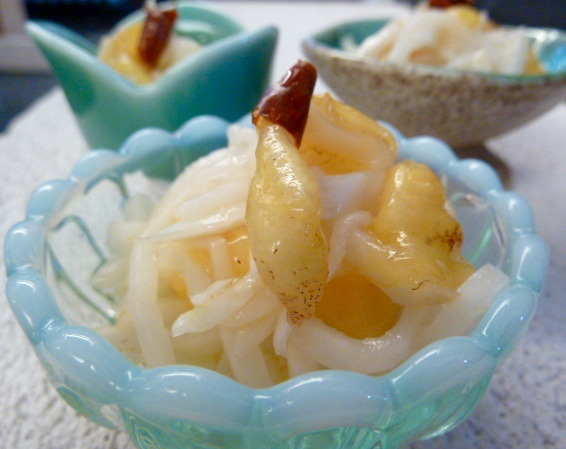
Mix the turnips with the persimmons and submerge them in Achara-su for about an hour before serving them in small dishes. When plating, I like to add a small piece of togarashi on top to alert people that it is a spicy dish.
Final dish
______________________
* Tip: If you like Achara-zuke double or even triple the recipe for Achara-su. It keeps well and if you have it on hand preparing Achara-zuke is a matter of minutes.
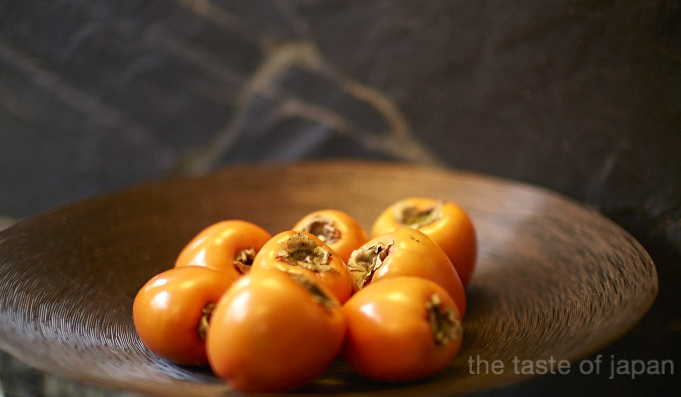
Almost as if they have been painted. The persimmons that just arrived not only look as though they were freshly picked, their taste tells me that they are: sweet, succulent and juicy. Irresistible, especially to my one-year old who just learns to speak. Her vocabulary is rather limited, but “Kaki” (how persimmons are called in Japan as well as Germany) and “more” is something that we hear quite often these days.
In Japan persimmon season starts a little earlier than in Europe, but right now you can get wonderful fruit at the peak of their season – in Japan called shun. Don’t be tempted to buy them in a supermarket, unless you want to be disappointed.
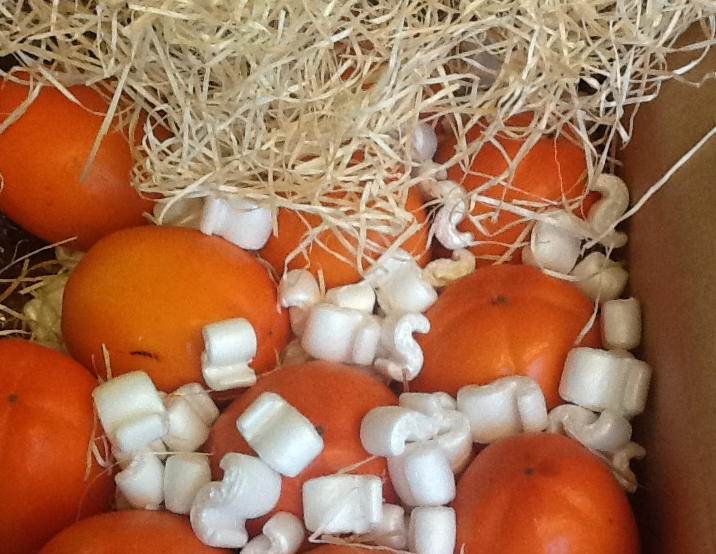
Unboxing persimmon-delivery
In a traditional Japanese kitchen nothing goes to waste and as such I not only use the flesh of persimmons. I also have a wonderful use for the peels, as long as they are organically grown. So on my mission to find persimmons that grown accordingly I came across Quiero Naranjas. Quiero Naranjas is a company, run by two brothers, that is specialized in growing tropical fruits in Valencia, Spain. They pick, very carefully wrap and ship the fruit right after your order so that you get to enjoy them when their flavors peak. The persimmons are usually ready for ordering in November, but you can witness their growth on the website all year long.
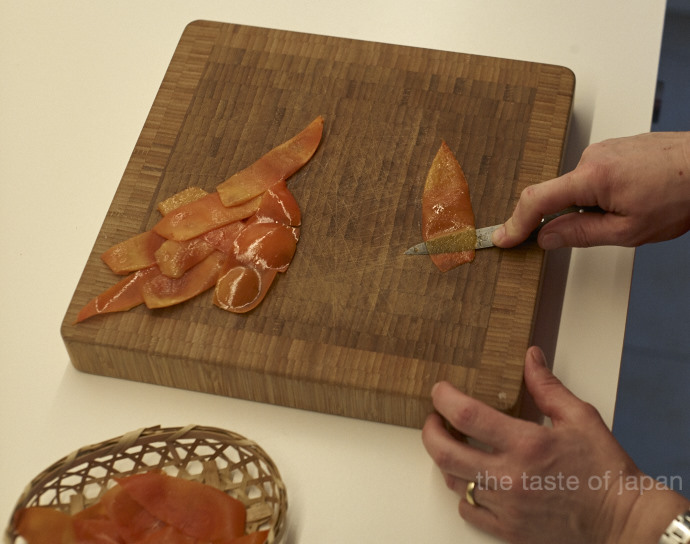
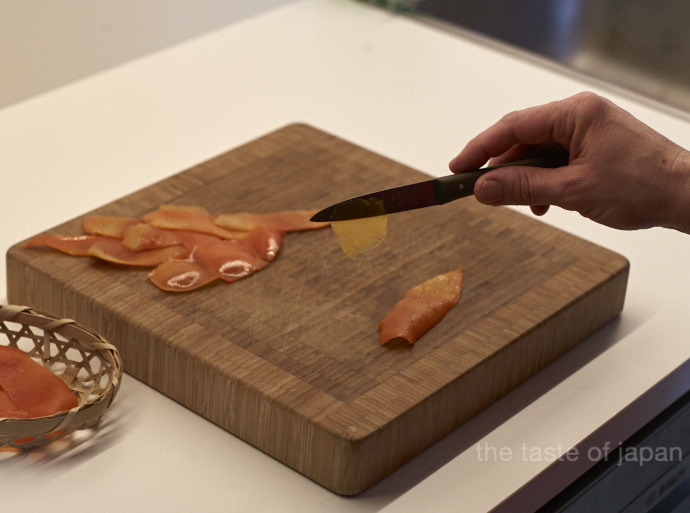
Removing the flesh from the peels
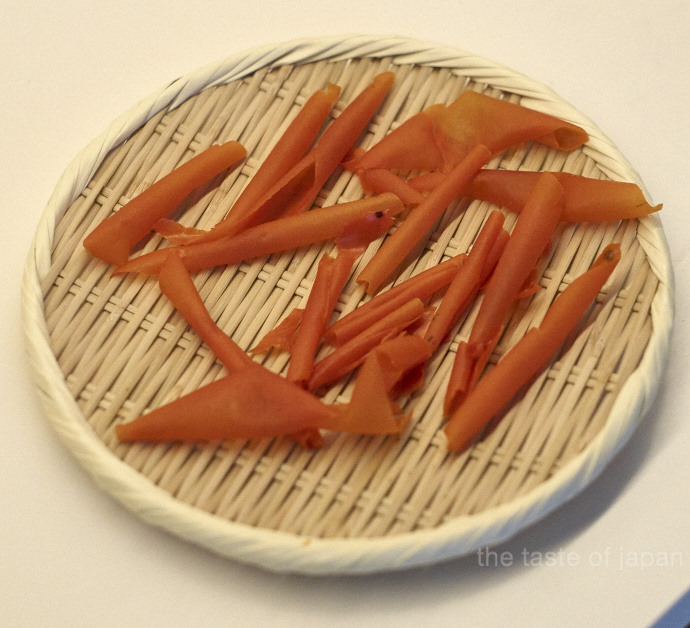
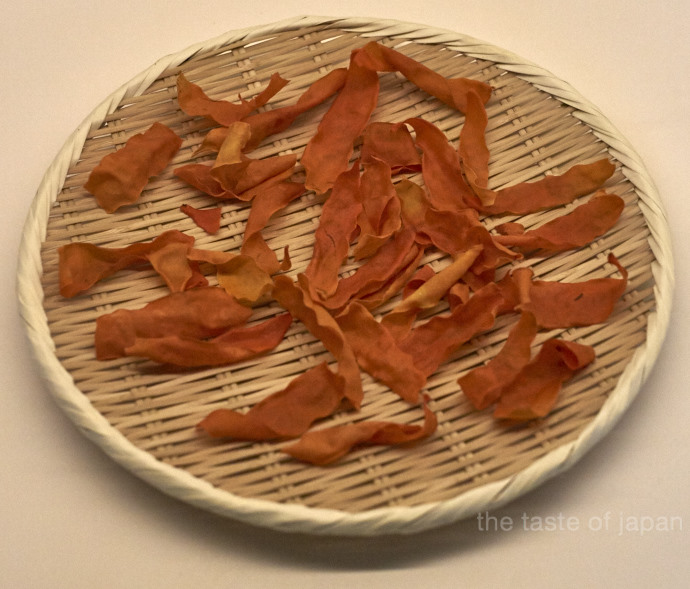
In my kitchen dried persimmons peels are a seasoning for my nuka-pot, which I use to prepare nuka-zuke. Nuka-zuke is a very traditional type of tsukemono –the Japanese way of pickling and fermenting, which will be featured here soon. To dry them I carefully shave the flesh completely off the (washed) peels before I spread them out to air-dry them above the heater for about 24 to 48 hours.
Removing the flesh from the peelsPersimmon peels ready to be dried
So until today, I have not managed to get anything more than the peels. The rest vanished completely in my youngest daughter’s little tummy. So I will order more. For my little one but also because there are so many wonderful dishes that I have been waiting to prepare for almost a year now and which I would like to introduce. So stay tuned for some ideas how to prepare persimmons the Japanese way.
The Japanese kitchen is very seasonal and in its traditional set up only uses fruits, vegetables and fish that are available at each specific time of the year. As such it doesn’t come on a surprise that even pickling, as a method of food preservation, follows the seasonality. Similar to Europe, summer time and in Japan also the previous rainy season are the busy times for pickling. But there are still things to be done in the pickle pot when temperatures drop at the end of the year.
One of the things to be pickled in wintertime is takuan. In a nutshell takuan is sun-dried daikon that has been pickled several months in nuka. Whereas nuka is rice bran that is the byproduct of milling rice for saké and white table rice. Once again here is an example that nothing goes to waste in the traditional Japanese Cuisine (see also my post on yukari).
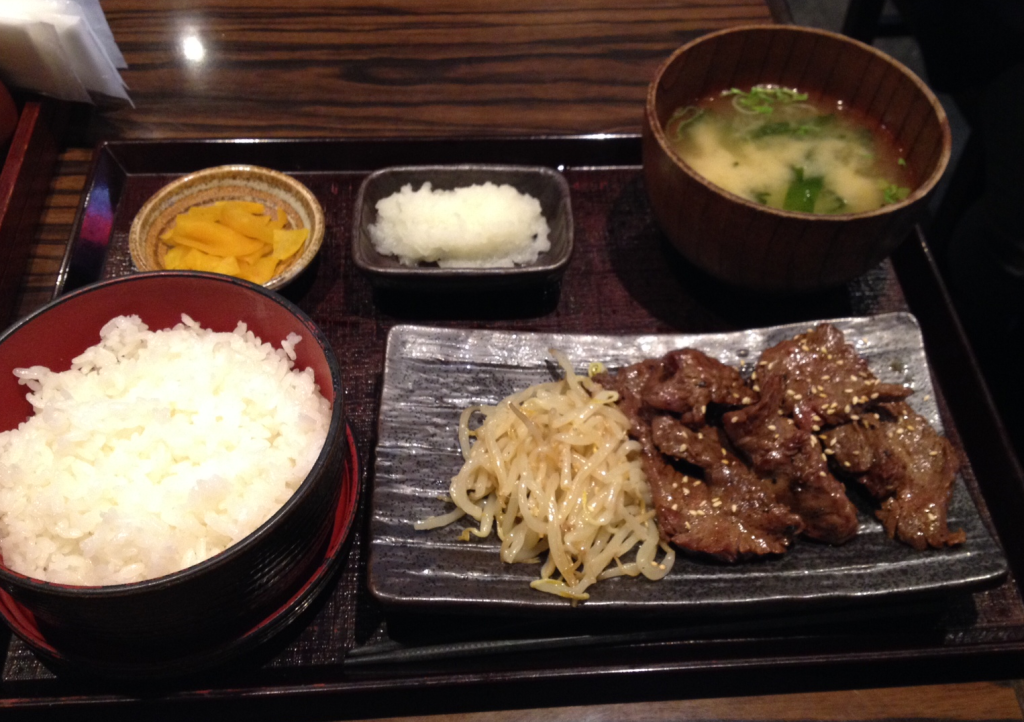
Bright yellow Takuan on my lunch tray
I really enjoy eating takuan with its crispiness that locks out any outside sounds for the split second of your biting pleasure. So does my oldest daughter. Unfortunately almost all of the takuan that you can buy in Japan – whether it be from an ordinary supermarket, an upscale depachika like Takashimaya or Mitsukoshi or a pickling specialty shop contains MSG. Therefore I decided that I will give it a(nother) shot and try to make takuan myself.
This is actually my second attempt in making takuan. Sadly my takuan challenge 2014/15 ended abrupt. I kept the pickle pot with the takuan outside on the terrace in front of my kitchen. Same as my girls’ sandpit, so that they are (theoretically) in my range of vision. And if I tell you now that nuka fully layered with pickling brine looks very similar to wet sand you might already guess what had happened. Shortly before the takuan was enjoyable my girls decided to help me and added some ‘nuka’ from the sandpit to the pickle pot, which resulted in a completely molded inedible mass.
This time I started the pickling shortly before Christmas last year and my pickle pot is locked away ever since. Pickling takuan is tricky. Many things can go wrong. Follow me as I will soon write more about the beginning stages and the development of this wonderful tsukémono-dish (umbrella term for pickled things).